
#1 Introduction to XState in React
It's time we take Xstate and state machines seriously


If you’re like me, you’ve probably used React state to manually manage the component state and modify it as it changes. This can get very complex and tedious to maintain. That’s why I want to help you learn how XState can help make your life easier.

Let me explain
XState is a state machine library for React. State machines are simply logical data structures to manage state. They allow you define all the states that you want your components or apps to have, in a declarative fashion and help you write very robust code.
- Instead of writing majority of our logic in the form of imperative expressions and conditionals, we define our logic using states and transitions
- State machines allow us to plan our logic independent of components
- Once our logic is thoroughly tested we then plug in our components.
Alright.
Enough talk. Let's code!
Let's build our very first Xstate app.
- You can start off with any React app really.
Xstateand it's tools are just plain javascript libraries that we can install usingyarnornpm. Installxstateand@xstate/reactinto your project.
yarn add xstate @xstate/react
- You can start off with this codesandbox if you like and then follow the rest of the chapter along!
- Now let's start building our first state machines in Xstate.
First statemachine
Let's start off by building a simple state machine in this chapter that toggles a value in the App file like so.
import { Machine } from "xstate";

const ToggleMachine = Machine({
  initial: "disabled",
  states: {
    enabled: {},
    disabled: {}
  }
});
This creates a Machine with 2 states disabled and enabled and it has an initial state of disabled. I will discuss more about this in just a moment. But let's continue with some changes to the machine now.
Let's add a couple of transitions to our machine.
const ToggleMachine = Machine({
  initial: "disabled",
  states: {
    enabled: {
      on: {
        DISABLE: "disabled"
      }
    },
    disabled: {
      on: {
        ENABLE: "enabled"
      }
    }
  }
});
So, we added our states are in the first step, but now, we also gave the state machine instructions on how to go to another state. These are called transitions. Transitions are the connections between one state and another.
- So, the "ENABLE" action moves the machine from state "disabled" to "enabled"
- And the "DISABLE" action moves the machine from state "enabled" to "disabled".
This is all rather simple to implement without machines etc. All we need is a boolean. But that's not the point. Read till the end of the article to understand why State Machines are so insanely powerful.
Let's try this out with React
Xstate comes with tools to make it easier to use in React and other frameworks. We already installed @xstate/react which is the tool that helps Xstate work well with React. Let's import useMachine from it and start using it like so.
import { useMachine } from "@xstate/react";
import { Machine } from "xstate";
import "./styles.css";


const ToggleMachine = Machine({
  initial: "disabled",
  states: {
    enabled: {
      on: {
        DISABLE: "disabled"
      }
    },
    disabled: {
      on: {
        ENABLE: "enabled"
      }
    }
  }
});

export default function App() {
  const [state, send] = useMachine(ToggleMachine);
  return (
    <div className="App">
      <p>The current state is {state.value}</p>
      <button onClick={() => send("ENABLE")}>Enable</button>
      <button onClick={() => send("DISABLE")}>Disable</button>
      <button onClick={() => send("LOLLLL")}>LOLLL</button>
    </div>
  );
}
- The
useMachinereturns an array containing two things. The currentstatethe machine is in and a function calledsendthat can be used to send transitions to the State machine. - So we grabbed the current state's name which is present in
state.valueand displayed it in a paragraph. - We also put in a three buttons which will send transitions. We can now send transitions
ENABLE,DISABLEandLOLLLLto the machine.

Understanding the awesomeness of state machines
- Here is the updated codesandbox with the code we added in this chapter.
Try clicking on those buttons and see what happens.
- State machines are robust by definition. You can't do things you never defined. For eg, if you are on disabled state and you send a
DISABLEtransition, nothing happens. Because a transitionDISABLEwas never defined ondisabledstate, the state machine automatically ignores it. We never wrote a condition like this did we ?
if(state === "disabled" && transition === "ENABLE"){

}
- We get this type of logical conditionals built in! This is a trivial use case but imagine a large authentication workflow that spans multiple screens. Having well defined states and having this kind of predictable behaviour given to us by default is a boon!
- Needless to say the 'LOLLLL' transition is ignored by every state.
- States and transitions need to be explicitly defined and the machine simply can't go to an unexpected state that has not been defined.
To recap
Well, State Machines rely heavily on being very explicit in how they deal with logic. For eg, a light bulb can only either be on or off. It cannot be in any other state. And state machines are simply data structures that deal with logic in this way. It is simply asking us these questions
- "What are all the states that you can be in?"
- "What is the starting state that you are in?"
- "How do you go one from one state to another? In other words, What are the transitions? "

This is just the very first state machine that we made, so we only talked about the absolute basics, but state machines in XState are very powerful and they are capable of replacing frameworks like Redux or Zustand easily in our apps and in fact offer much more reliability since our app is simply not capable of going into states that are not defined.
What else can XState do
- Well, it has an amazing visualiser tool (You can check out the visualiser at xstate.js.org/viz) that you can use to write your machines in and run them with various transitions and see how it works first before you use it in your apps. Here is how our machine is automatically visualised in the visualiser.
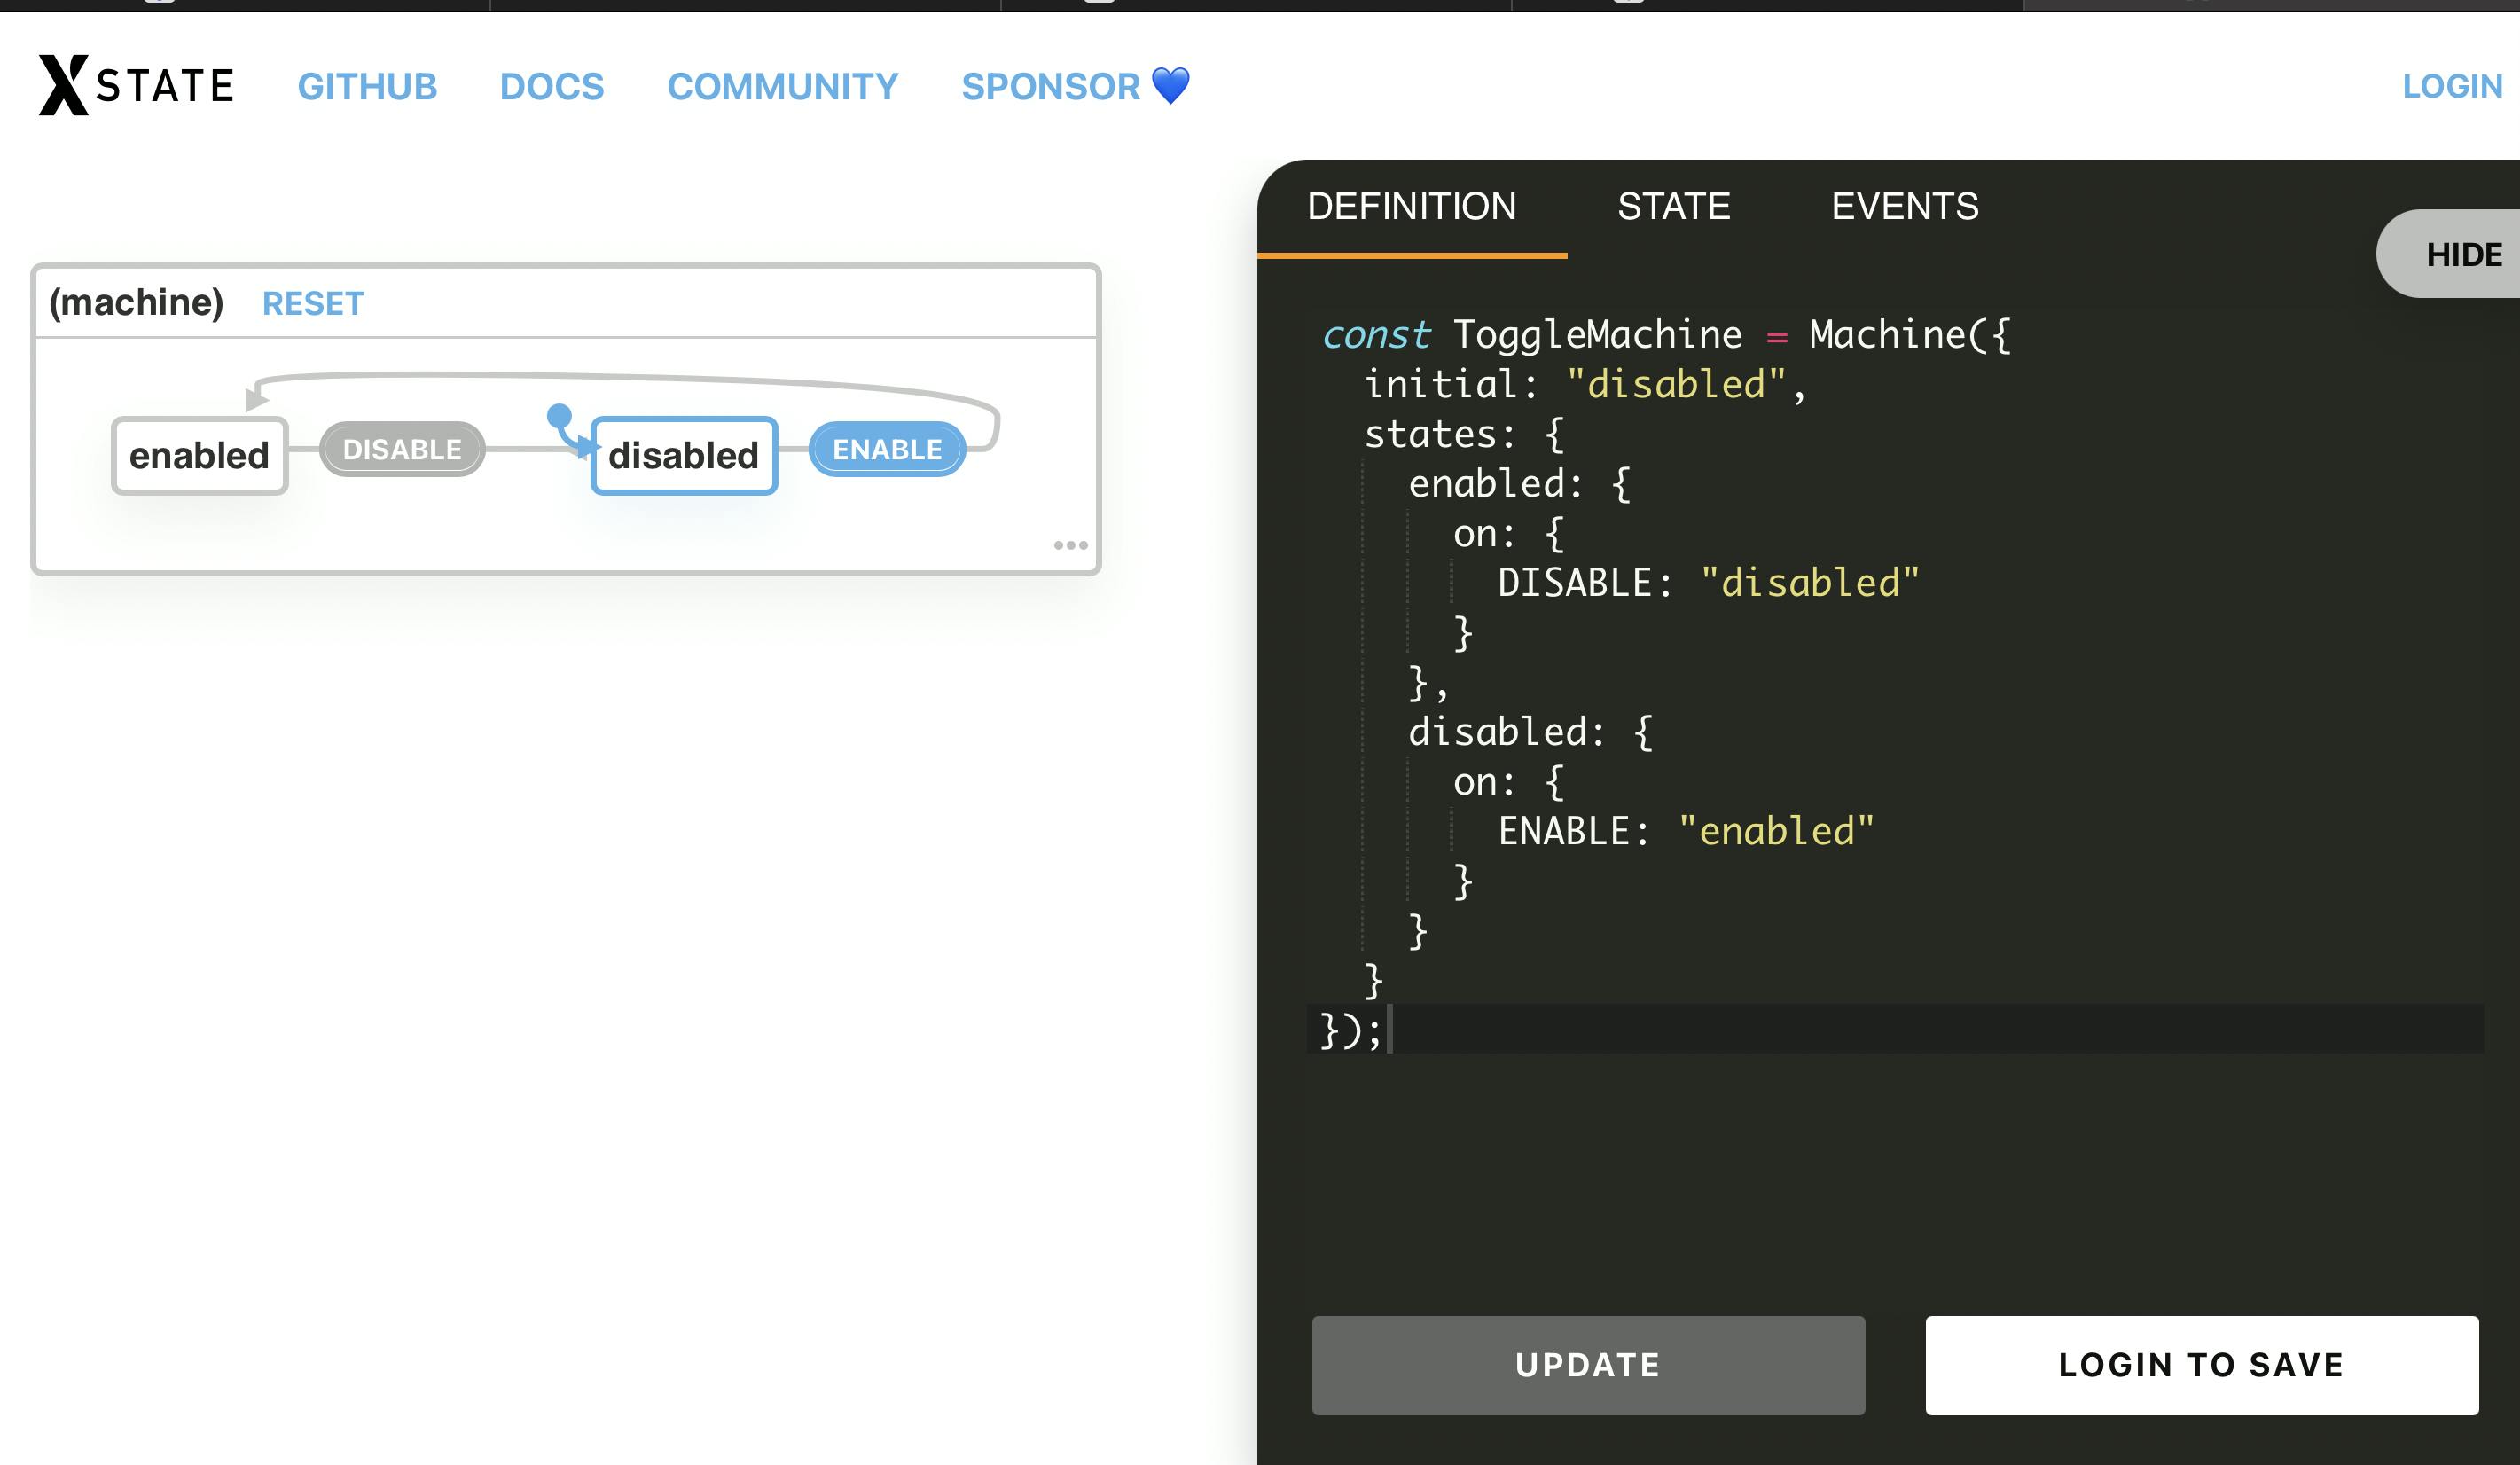
- Notice how our states have been populated into a nice UI that we can read better as developers. This is a massive advantage. You can't visualise a bunch of
if-elseconditions, but you can visualise state machines easily.
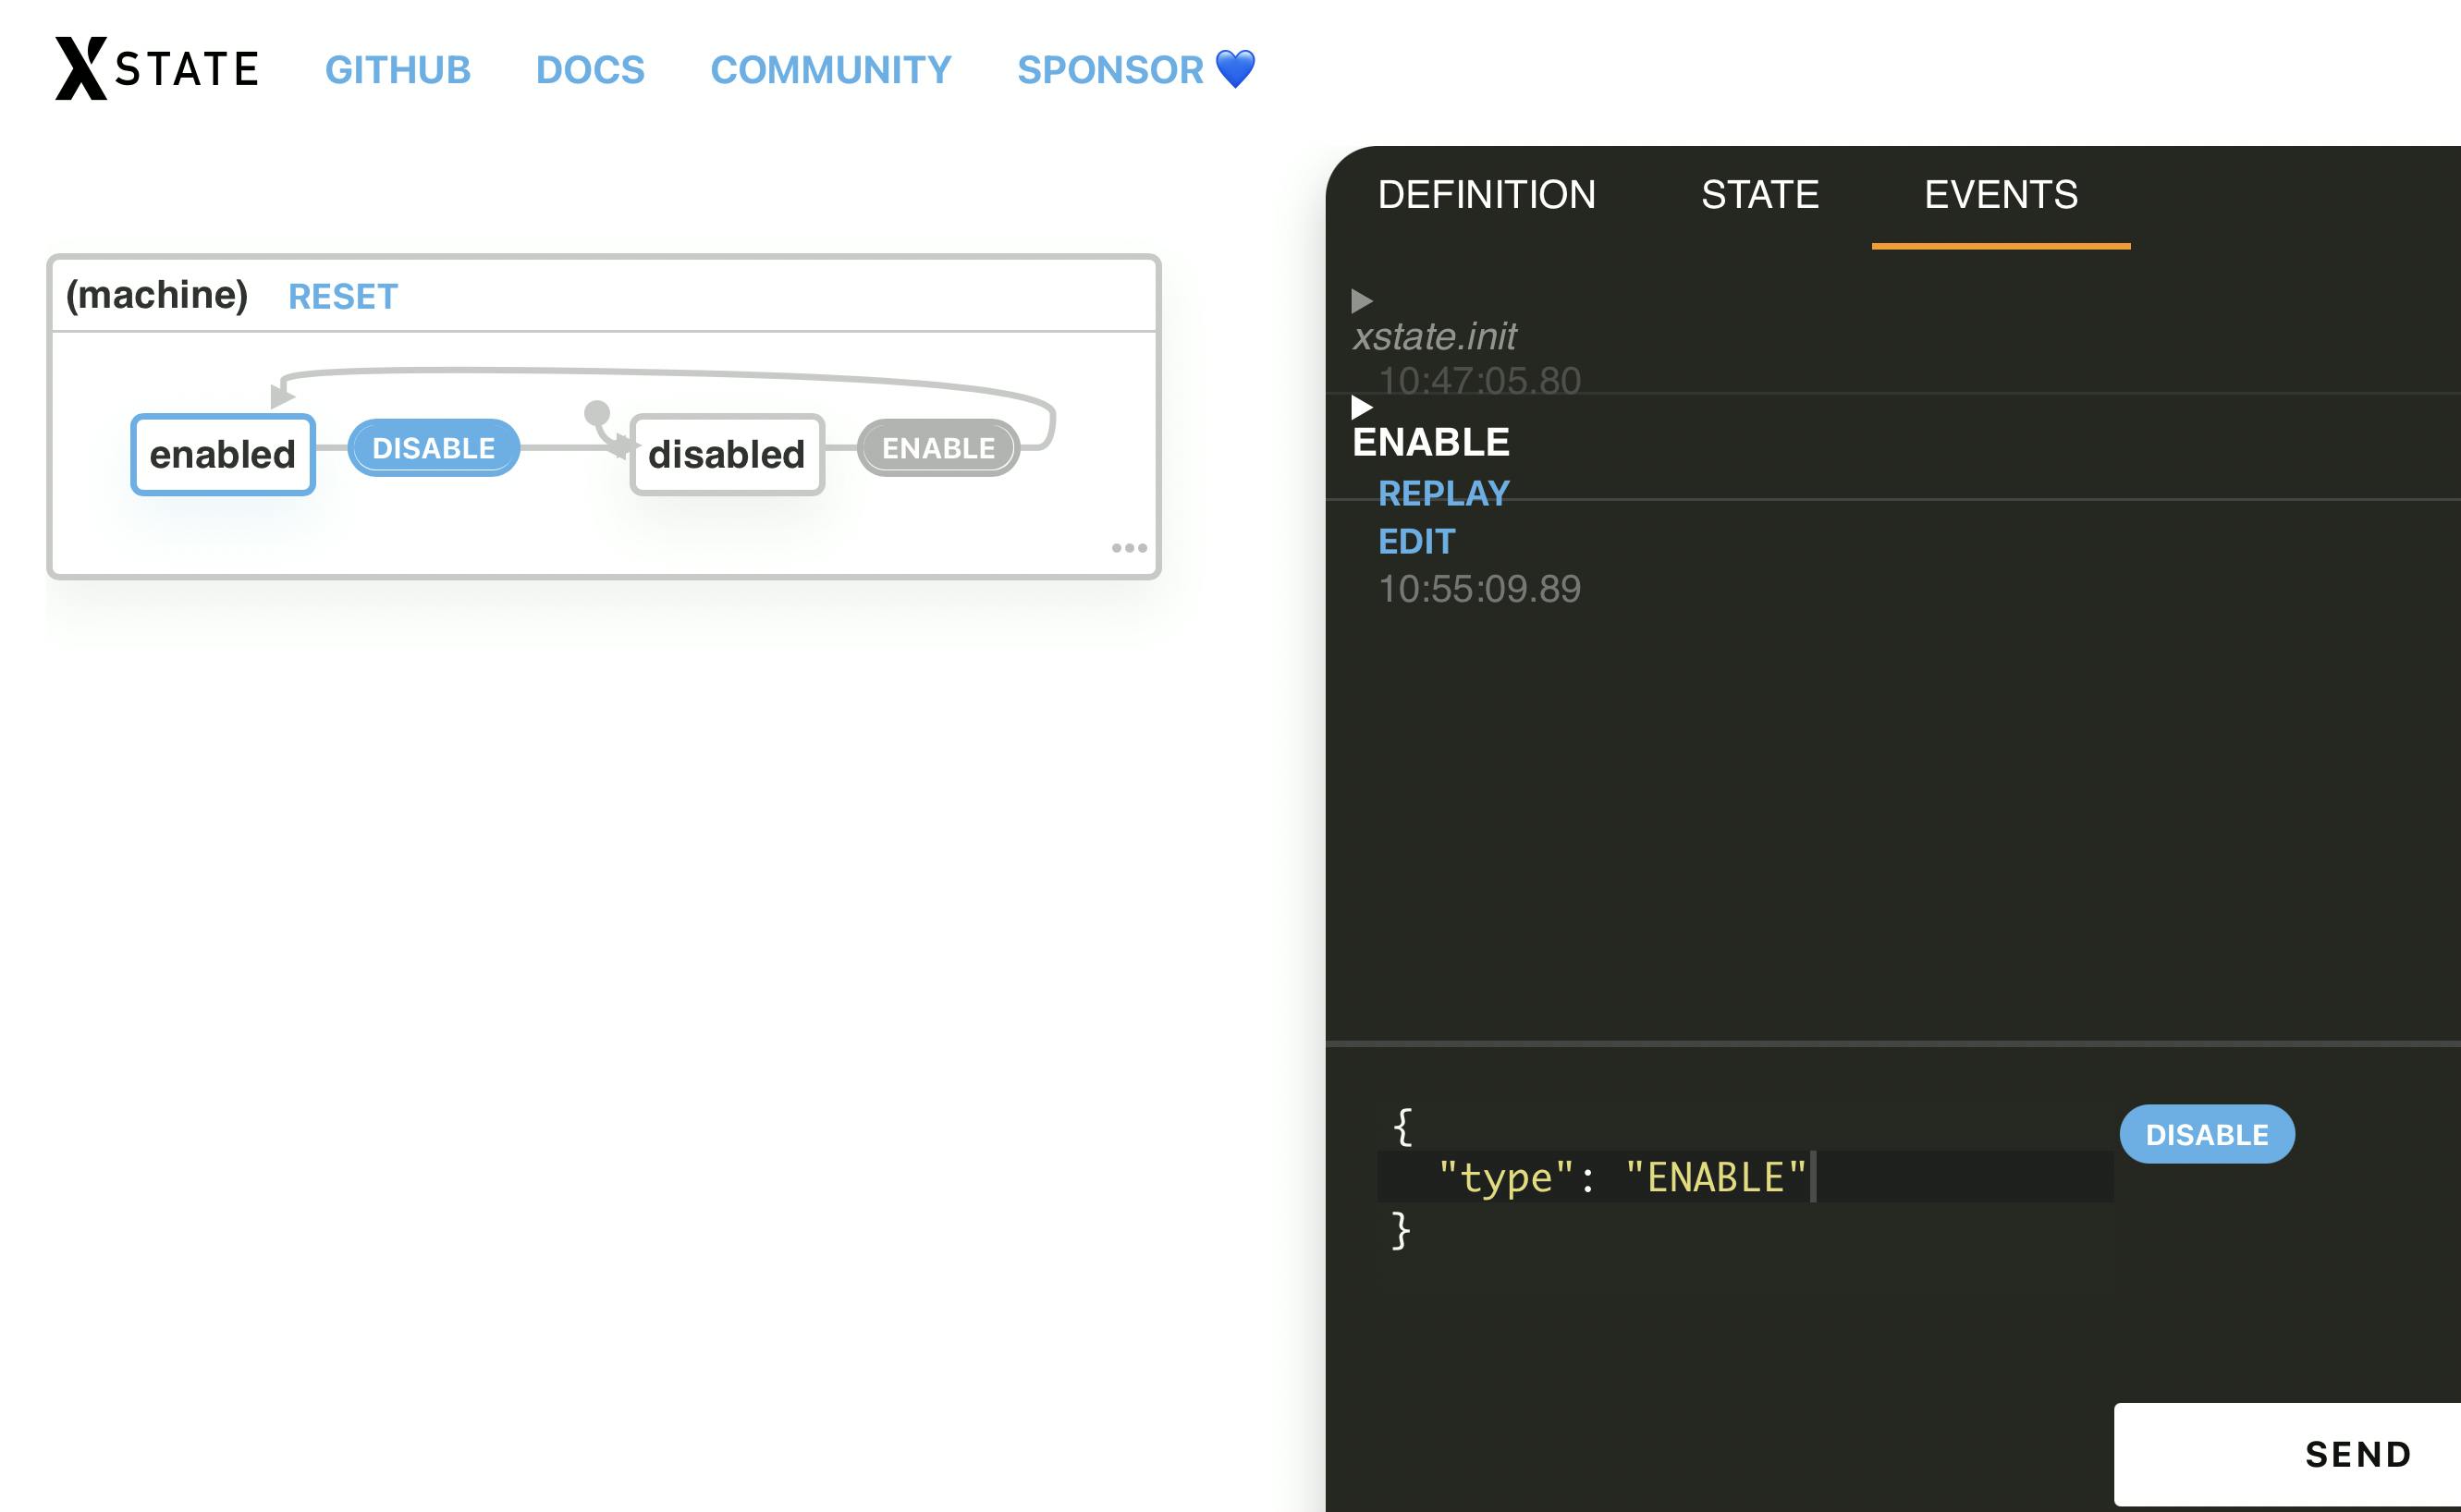
You don't need your components to build logic!
- Using the visualiser you are already able to run the machine through multiple transitions independently from your components. This separation helps us build logics that are independently testable without the baggage of the React environment.
- Also , The visualiser is just the start. Very soon you will be able to build state machines using drag and drop interfaces and build large blocks of code without opening your editor. How cool is that?
Graphical State Machine builders are the future
Drag and drop interfaces to build our apps quickly are already on the rise and state machines will accelerate this phenomenon even further. Statecharts.io is already building something of this sort and will be out soon. This is an exciting time to be a frontend engineer.
Let me know your thoughts in the comments!! Let's talk more about XState in the next chapter. See you there!
Thanks and Please support my work
- Writing blog posts and making videos is an effort that takes many hours in my day. I do it because I love teaching and make great content.
- However, I need your support too. Please support my work and follow my social accounts to help me continue to make great content.
- Here are my social links.
Follow me on Twiter
Subscribe to my channel on Youtube
Thank you!