#4 First steps with Next.js - Delightful React
React apps can be built with plain HTML, CSS, and JavaScript alone. However, building with plain HTML can be very difficult, mechanical and time consuming. The React developer ecosystem, has innovated countless times over a period of time to build amazing tools like create-react-app, NextJS, Gatsby, etc. to help developers build apps quickly and flexibly.

In this book we will use NextJS, which is perhaps, the most complete React framework out there today.
NextJS comes with a huge number of features that help you build apps from start to finish in a developer friendly way. We will talk about quite a few of them in this book as we go along.
The blog website project
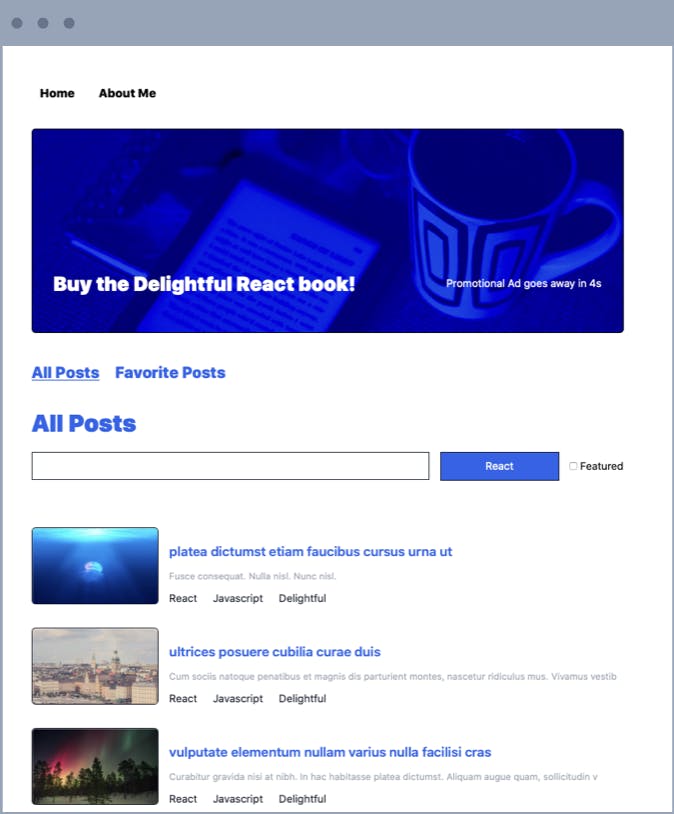
Through this book, we will be building a blogging website with NextJS, that looks something like this.
Get Started
First of all, let us get started and set up our directory to build our web app. These instructions will work whether you're on Windows, Linux, or Mac OS. But you have to make sure that you have NodeJS, Yarn and Git installed on your machine.

We will need Yarn to install React, ReactDOM and Next.js modules to be installed into our project. Yarn is a Node.js package manager and also helps us run next.js scripts on the command line easily.
You can check if they are installed by running these commands anywhere in your terminal.
Check if NodeJS(>=v10) is installed.
node --versionCheck if Yarn is installed.
yarn --versionCheck if Git is installed.
git --version
If you haven't installed any of these, please install them from the respective websites.
Creating our Next.js app
We are ready to start! There are a couple of ways you can setup the app with Next.js.
- You can either head over here where I configured everything for you and clone the repo or
- You can follow the instructions here to truly get a hang of what we are doing. Of course, you can also clone the repo and then just walk through these steps to see if you want to get a feel of what we are doing.
Let’s begin!
First, create a directory for the project. Let’s call it blog-app.
mkdir blog-appEnter the blog-app directory
cd blog-appInitialize it with yarn. You have a couple of options here.
a. You can either initialise it with defaults or
yarn init -yb. Run the initialisation script and enter details
yarn initInitialize git in this repository. We will need this towards the end of the project to deploy it.
git initNow we are finally ready to install packages. Let’s install next, react and react-dom packages into our project.
yarn add next react react-domNow take a look at our package.json. It should look something like this.
{
 "name": "blog-app",
 "version": "1.0.0",
 "main": "index.js",
 "license": "MIT",
 "dependencies": {
   "next": "^10.0.4",
   "react": "^17.0.1",
   "react-dom": "^17.0.1"
 }
}
We need to modify add a scripts section to our package.json like so that our project can be used with yarn to run next commands as scripts.
{
 "name": "blog-app",
 "version": "1.0.0",
 "main": "index.js",
 "license": "MIT",
 "dependencies": {
   "next": "^10.0.4",
   "react": "^17.0.1",
   "react-dom": "^17.0.1"
 },
 "scripts":{
     "dev": "next dev",
     "start": "next start",
     "build": "next build"
 }
}
Alright! Now our packages and scripts are setup.
Time to add our components.
Unlike the HTML app we did earlier, we don’t need to manage HTML in our NextJS app. Because NextJS handles that for us. Here it is a little different. NextJS handles apps in the form of app pages. I will explain this in a minute.
- Let’s create a folder called pages inside our directory. The folder pages is the directory that NextJS will look into to figure out what pages our apps has. This folder is mandatory.
mkdir pages
- Let’s create a folder called pages inside our directory. The folder pages is the directory that NextJS will look into to figure out what pages our apps has. This folder is mandatory.
Let’s create a file named index.js in the pages folder. Lets make a component in this file like so and also export default it. This will be our home page.
//pages/index.js
function Home(){
  return <div>
      <h1> Delightful React </h1>
      <img
        src="https://assets.delightful-react.com/scenery.jpg"
      />
      <p>The best way to learn React!</p>
      <a href="https://google.com">Google</a>
      <br/>
      <button>Click Me!</button>
    </div>
}

export default Home;
Setup is complete
Our app is fully set up now. Let's start running the app using
yarn dev
This will run our NextJS app in a local web server server on port 3000. So open your browser and open “localhost:3000” and our app will be ready!!
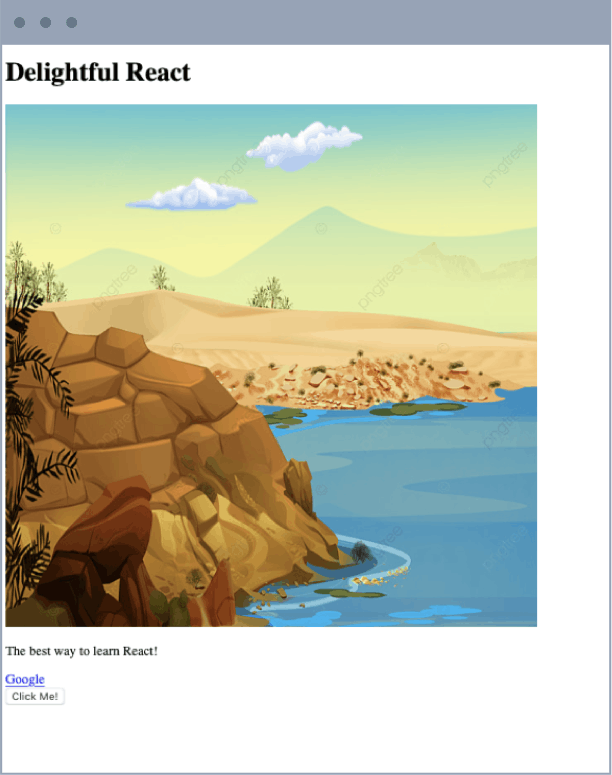
Our app is up and running on NextJS too!
Observations
Our app is now running on localhost:3000 and our component is already being served on the page. However, did we render the Home component anywhere as <Home/> anywhere?
- Well, we didn't render the Home component. Next.js did it automatically for us.
- Next.js thinks of an app as a collection of pages and it loads a page and renders the component exported by that page automatically if that page is "matched" by it's internal Router.
Let's talk more about Routing.
Routing explained
Next.js routing doesn't require any extra code from our end. It's based on a simple convention that whichever files are put in the pages folder, they are automatically mapped to routes.
- The first thing the router does is this. It automatically loads the component exported from index.js file when the '/' route of the app is loaded.
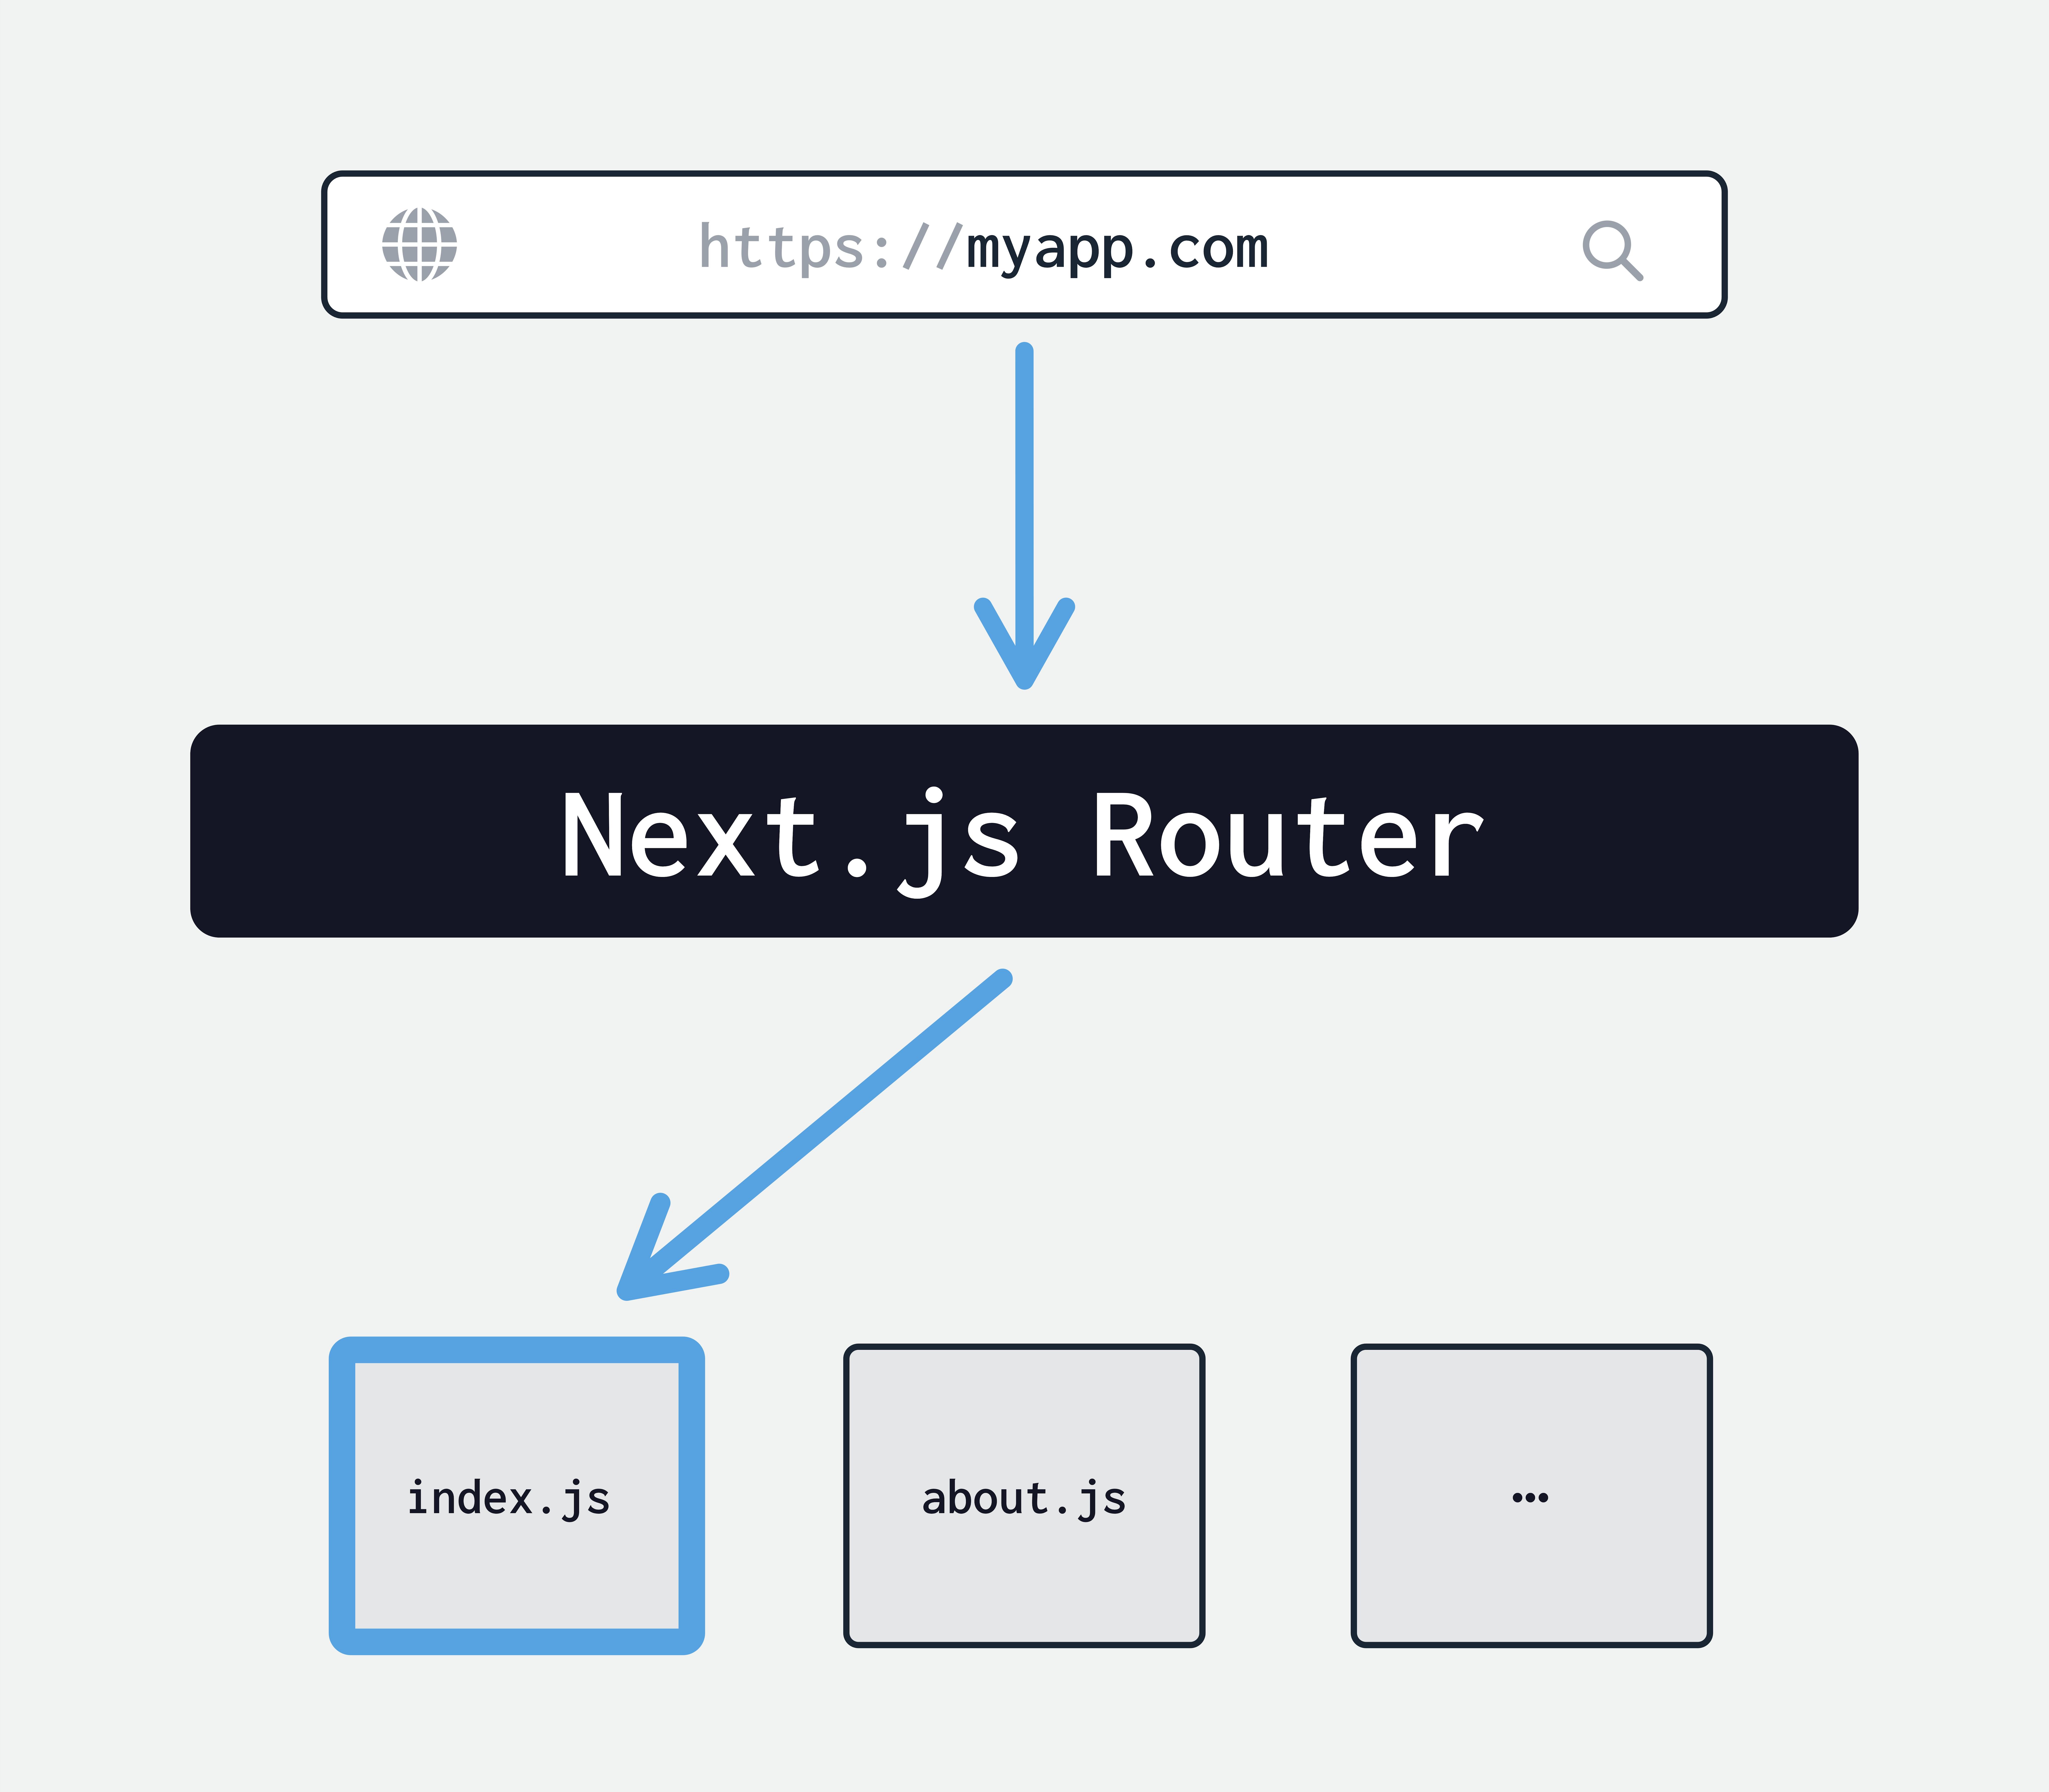
- For other routes in the app, Next.js looks for the route and checks if a file with the same name as the route exists and loads the component from that file.
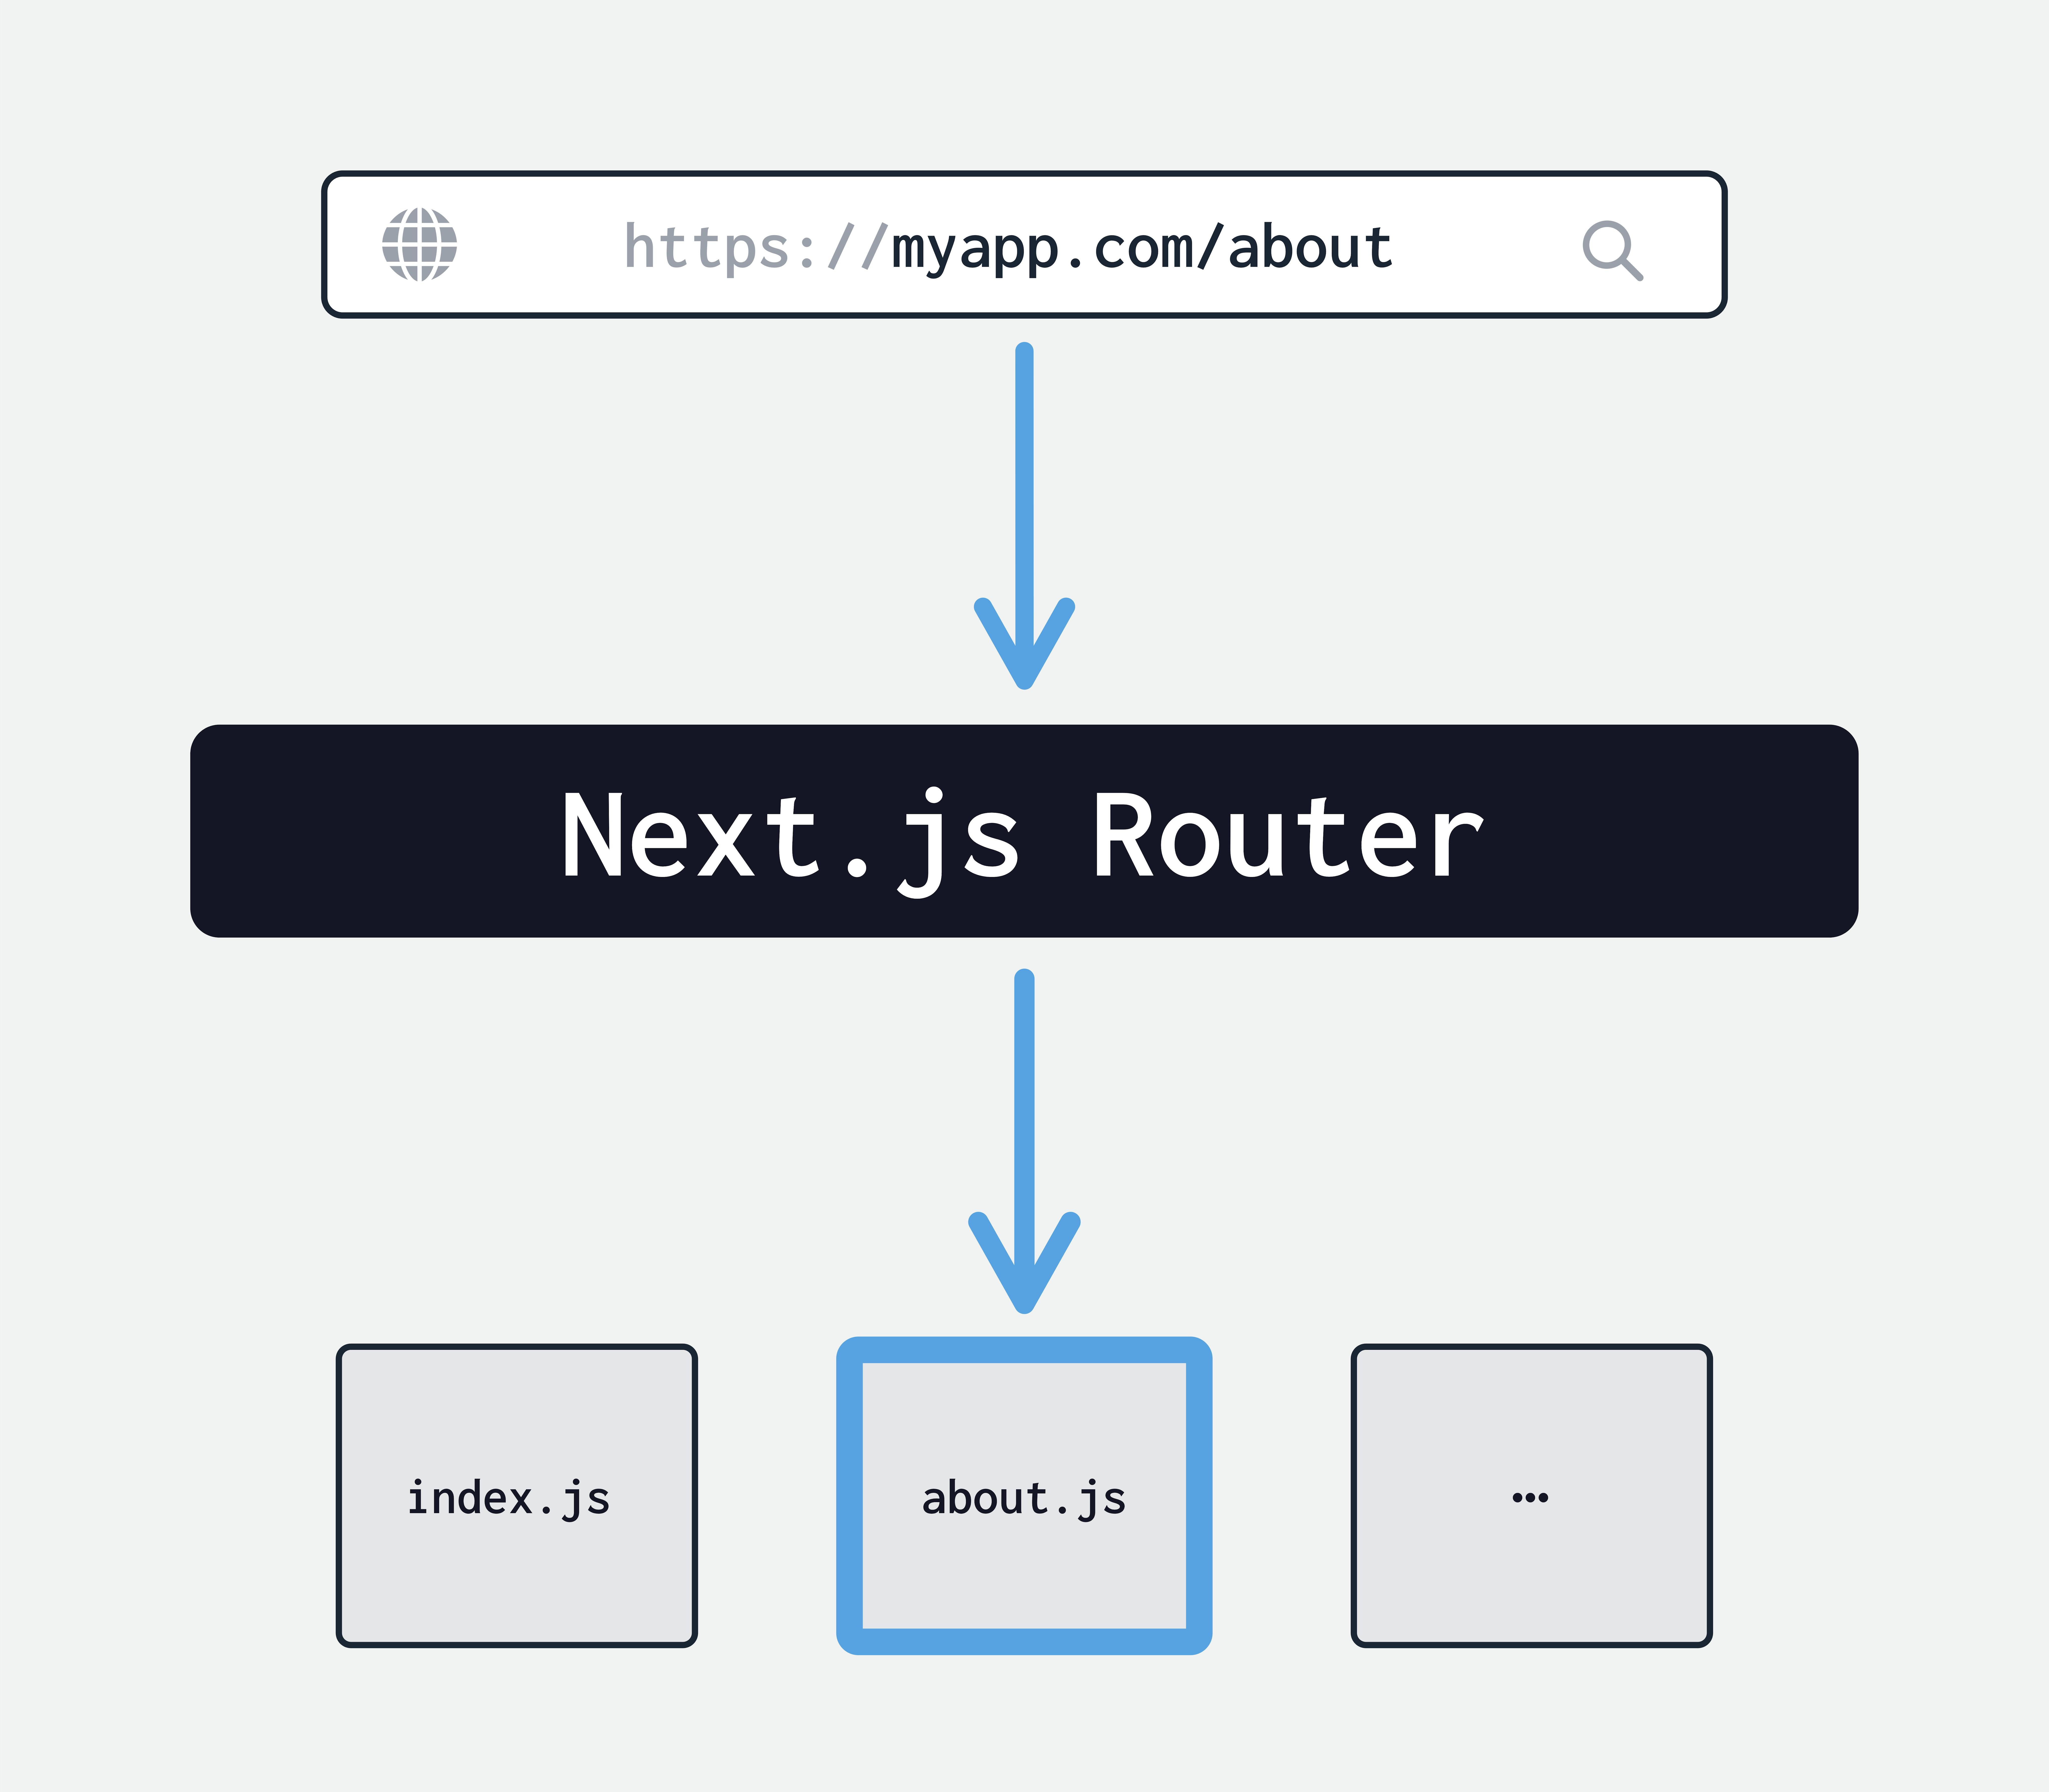
So create a file called about.js in the pages folder and add the following code in it.
export default function About(){
    return <div>
      <h1>About page</h1>
      <img src="https://assets.delightful-react.com/kindle.jpg"/>
      <p>Id ad in arcu erat ...</p>
      <p>Metus suscipit ....</p>
    </div>
  }
Now head over to localhost:3000/about to see this component’s elements appear on the screen and we should see our About page rendered too.
- It also handles non-existent routes by showing a nice error message.
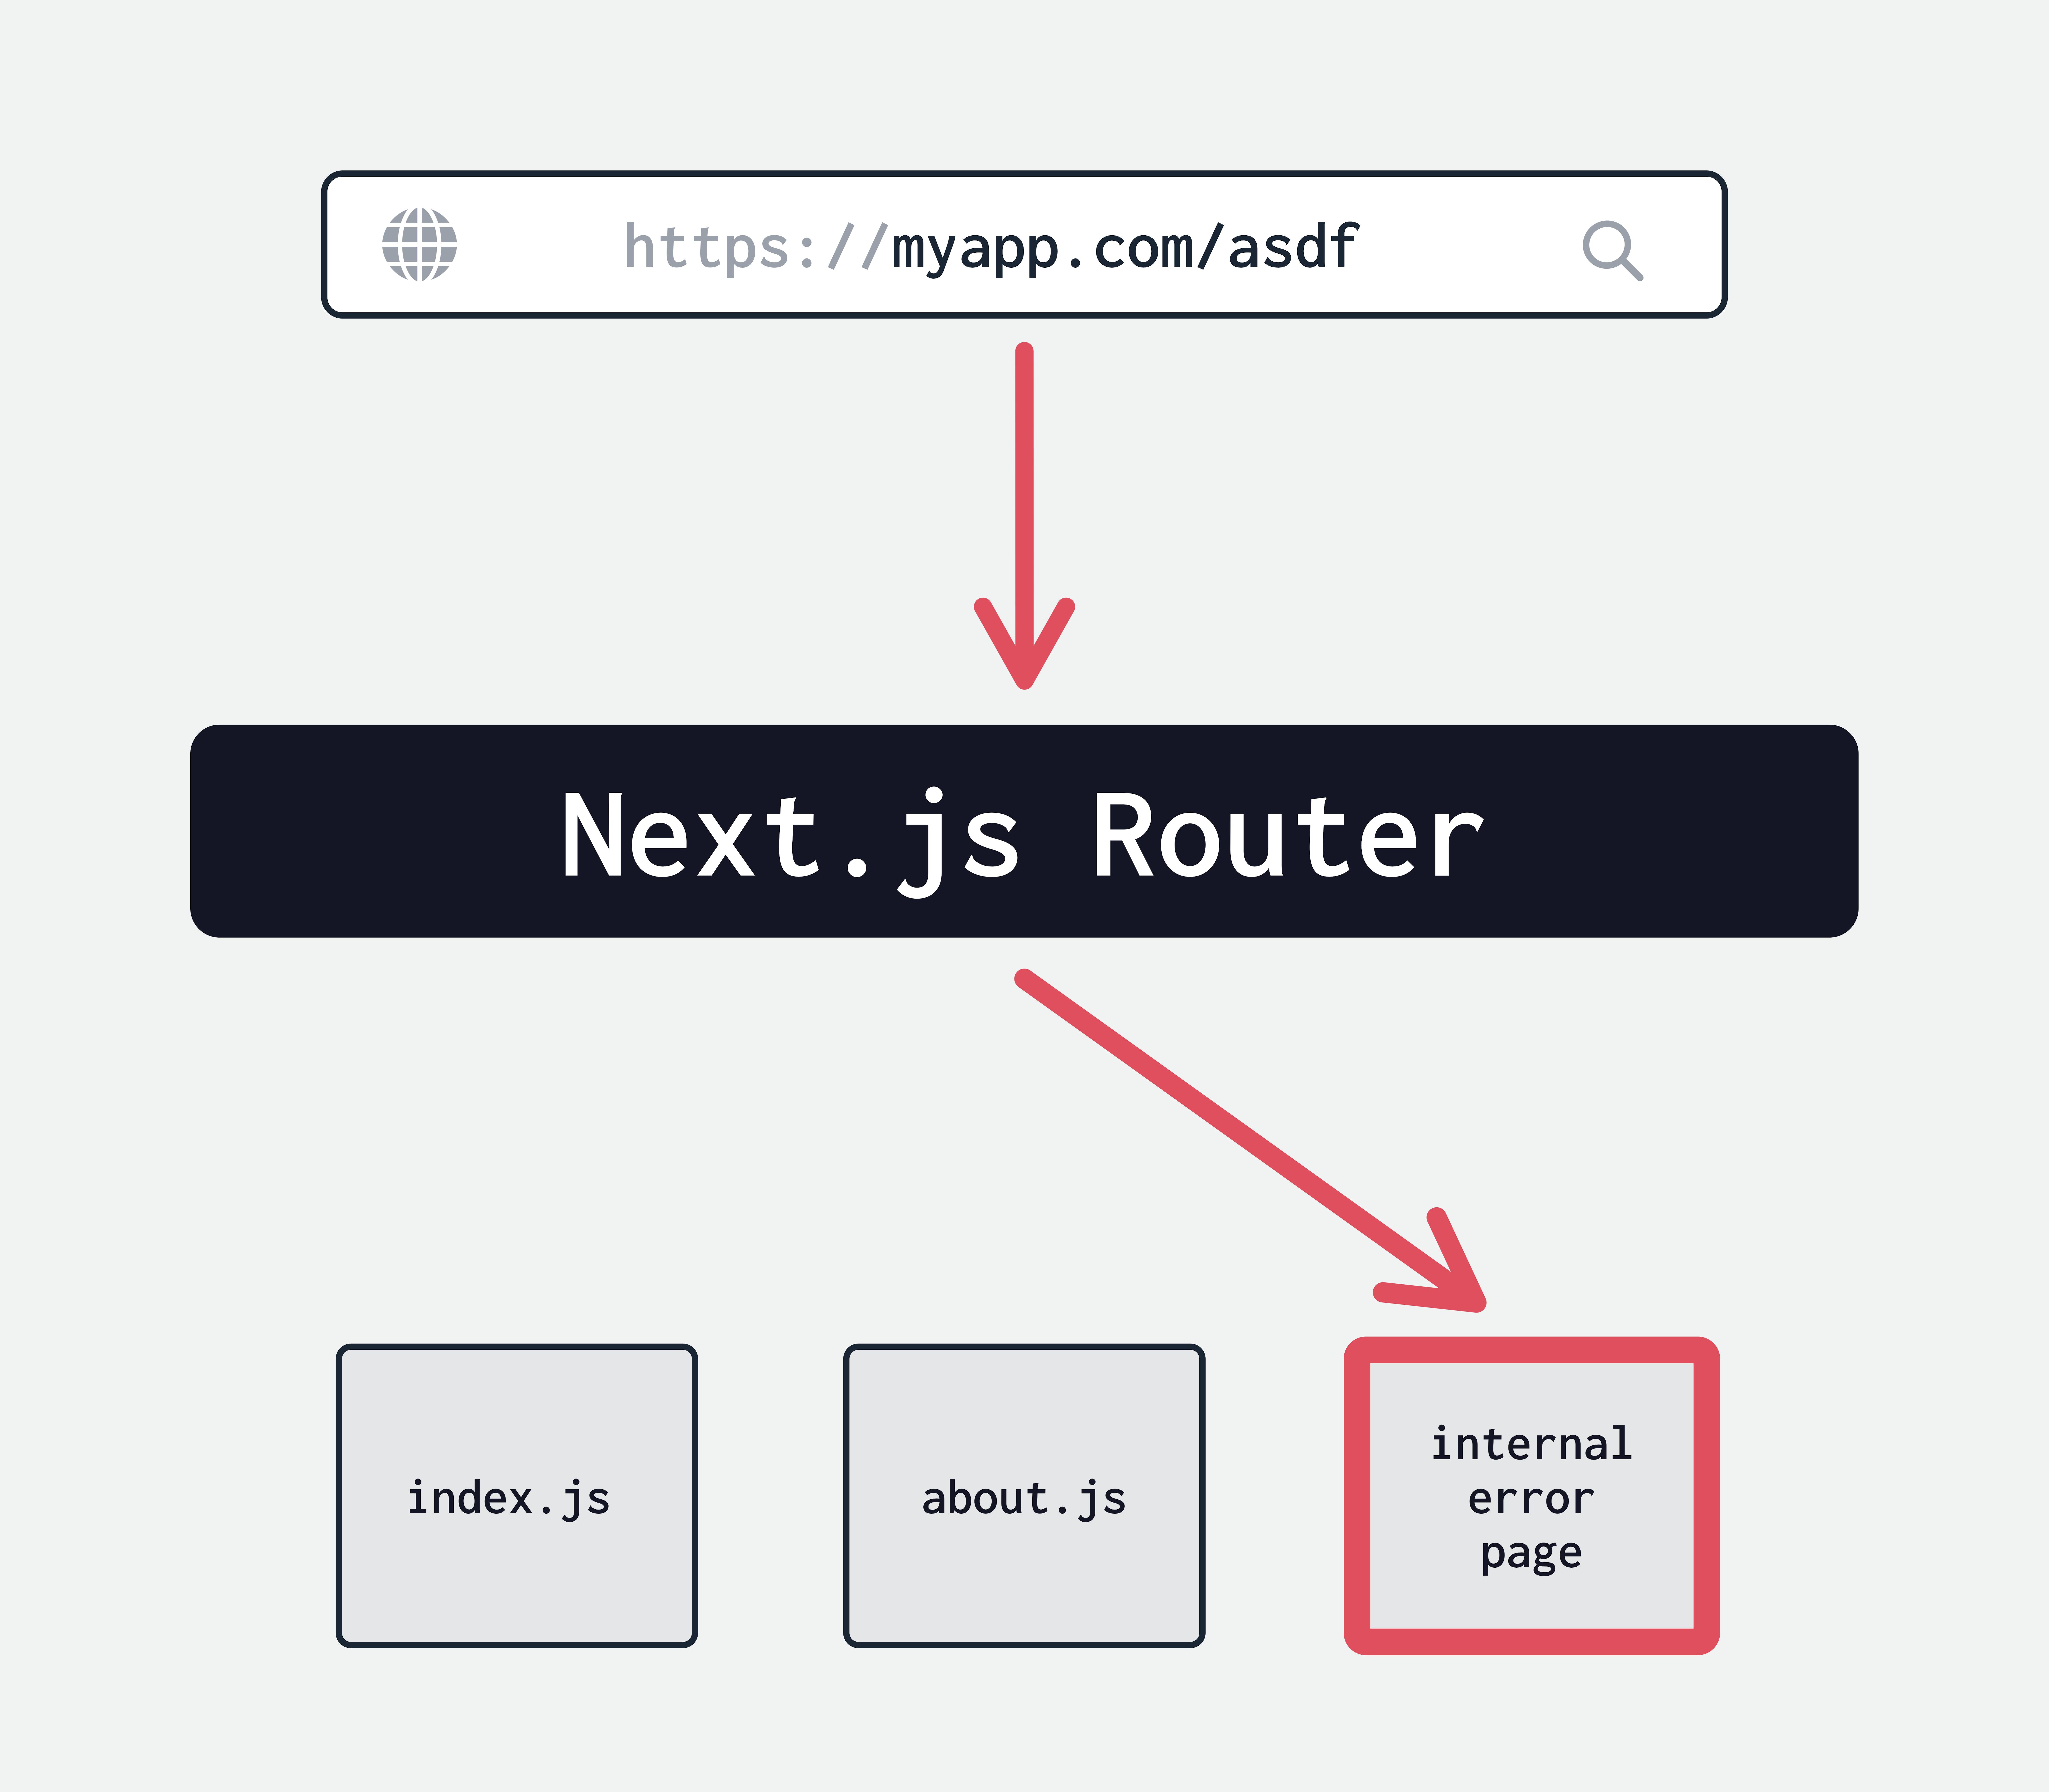
Head over to the route localhost:3000/asdf and we can see an error message with status code 404.

Next.js is awesome
NextJS is an amazing framework because it offers many many features out of the box. It includes toolings, like Babel, Webpack and PostCSS for making our lives as developers very easy.

- NextJS uses Babel internally to transform the JSX and other modern syntax in JavaScript into plain JavaScript that browsers can understand.
- NextJS uses Webpack internally to pack all the pages, components and modules together, and serve them in our web server.
- It also uses PostCSS to make our CSS styling easier and cross browser compatible.
- NextJS also comes with a lot of react components of its own to make our components easier to build and we will see some of them as we go along this course.
Generous built-in behaviour
Next.JS comes with an incredible set of features that makes developing web apps with it an absolute breeze. Some of the awesome features of NextJS include the following
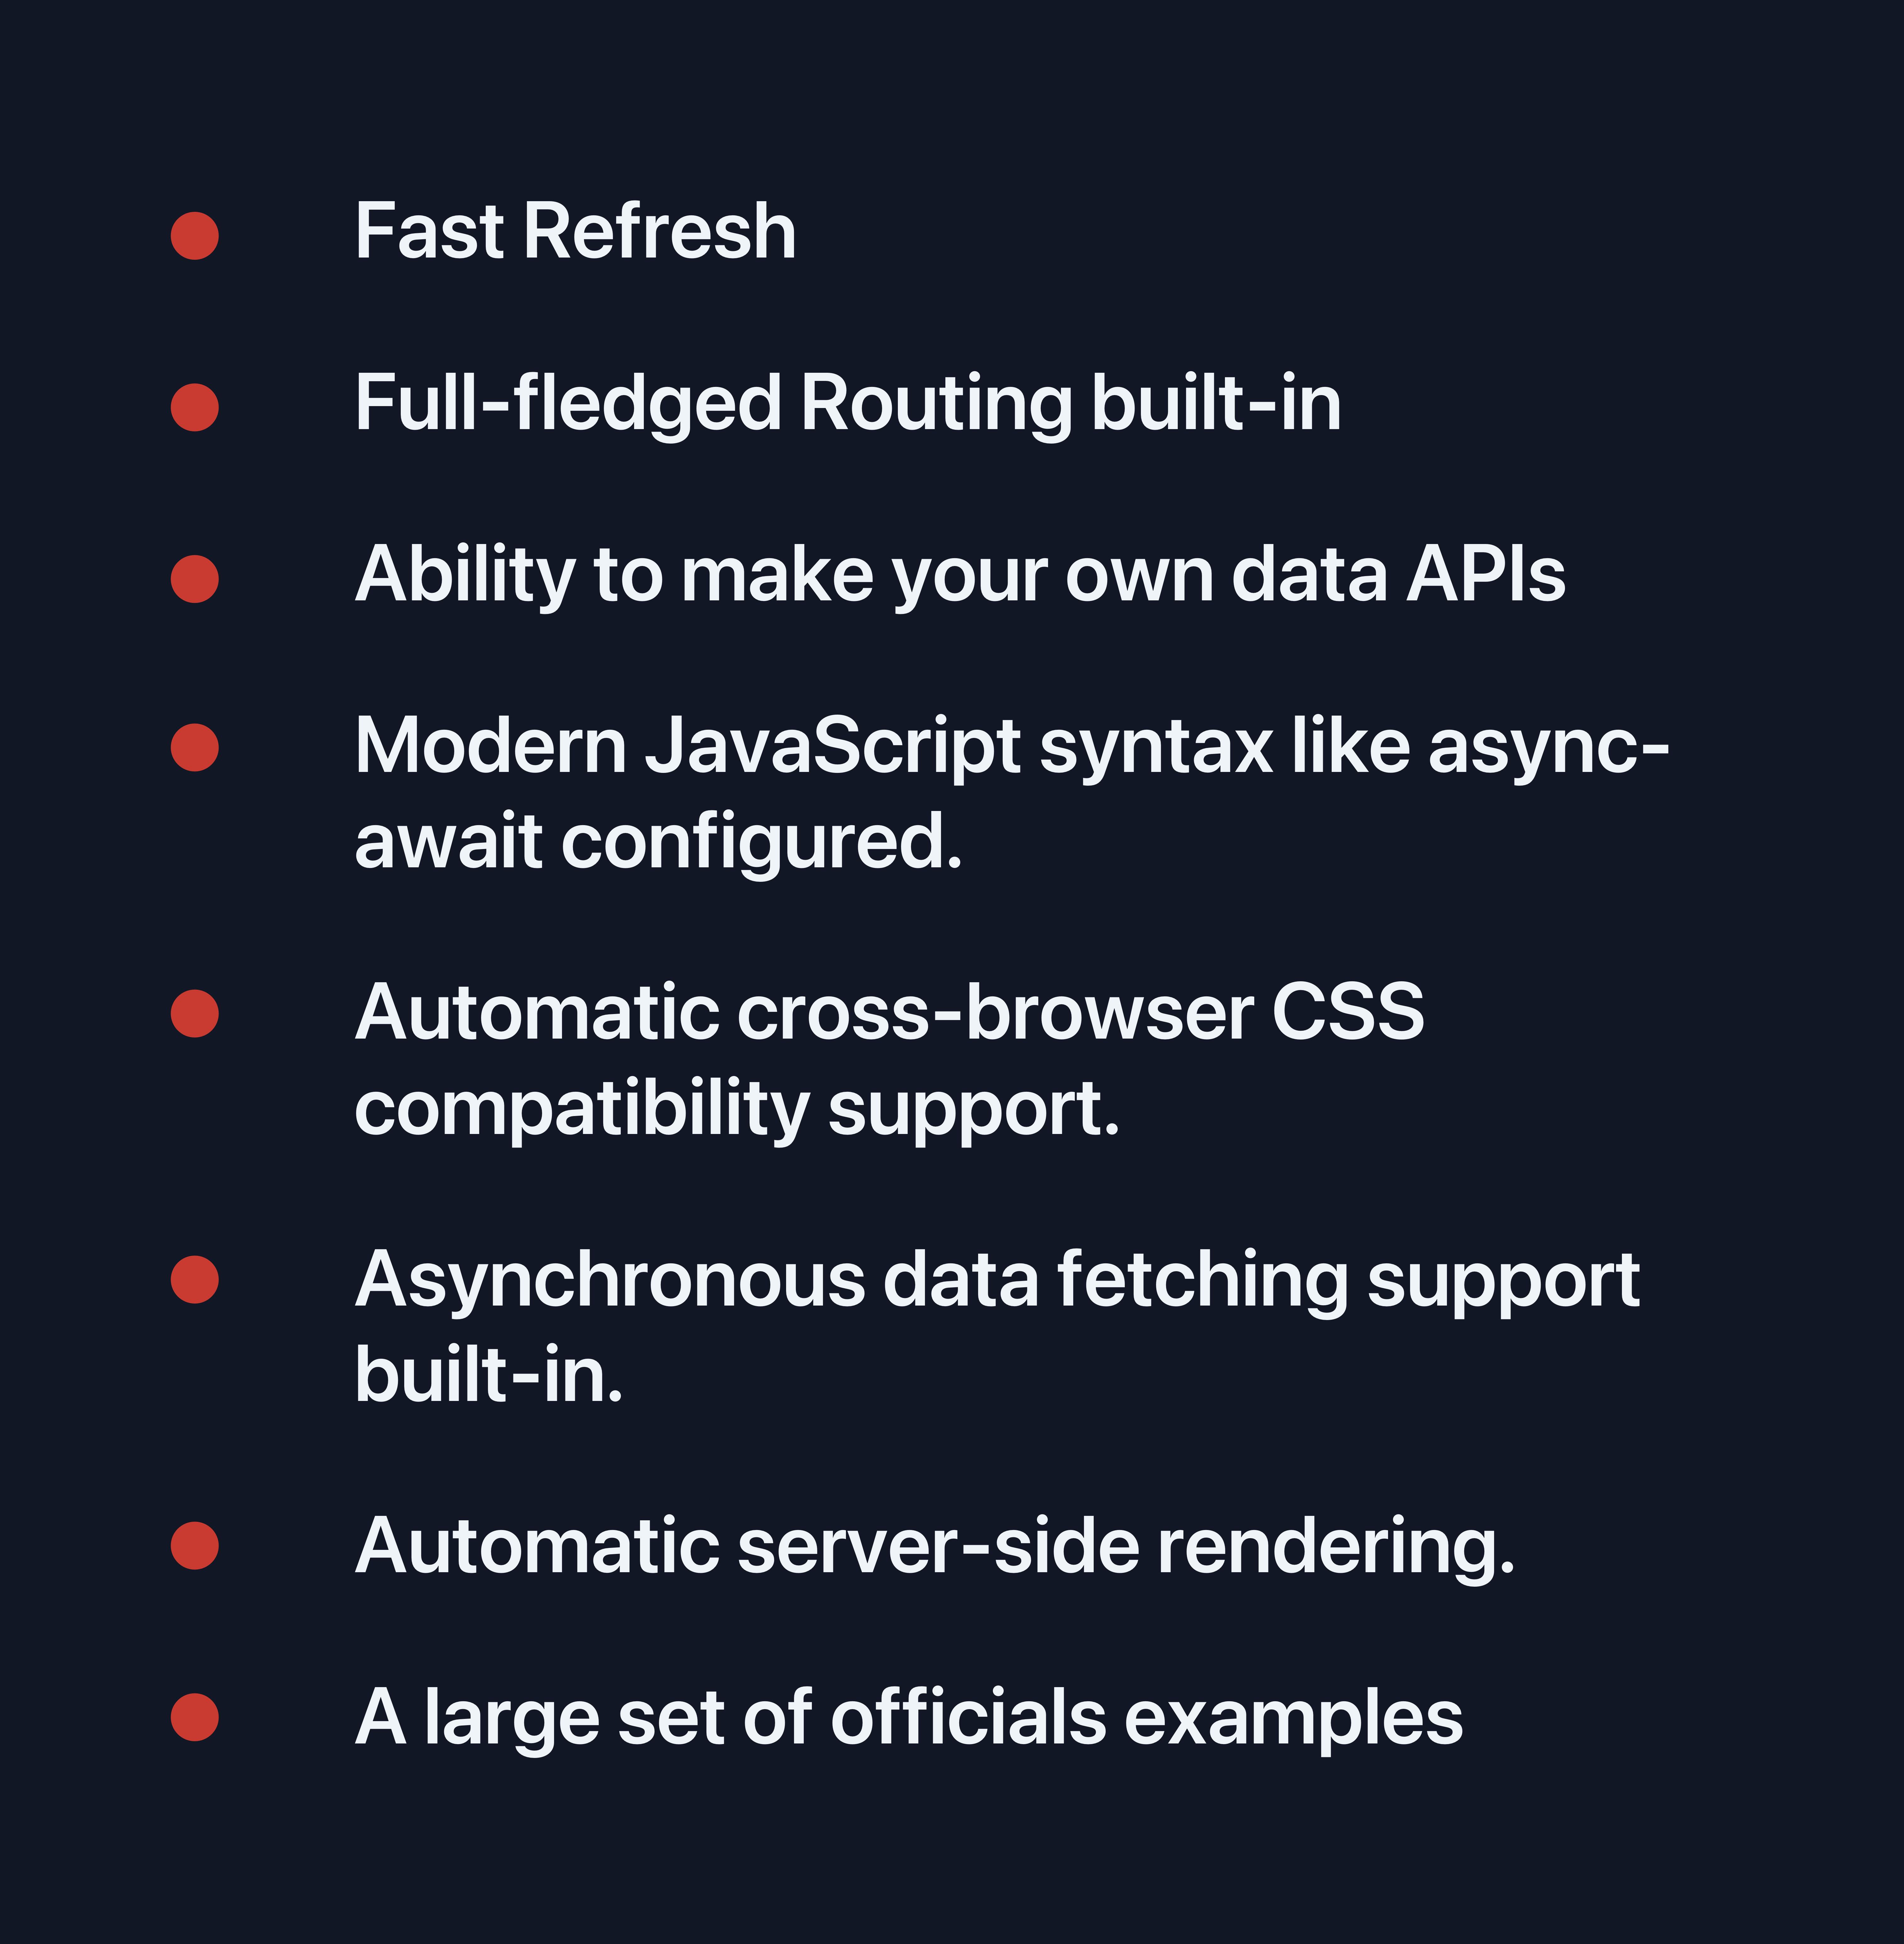
I can't praise Next.js Routing enough
Routing in React.js apps is often not easy.
It involves setting up a router on the client-side and synchronizing the routing on the server-side using server-side request-response APIs and coordinating with them to have a synchronized experience both on the server and the client.
We will discuss server-side and client-side rendering in detail in a future chapter. But I want to emphasize the fact that managing routing on both server and client, while synchronizing the data across both environments, is especially hard. And the Next.js team at Vercel has done a tremendous job to make building production ready apps so easy.
- It's a very big deal that NextJS comes with the complete routing solution for React apps built-in out of the box. So there is nothing for you to do except create a pages folder and make components in your files, which will be loaded accordingly.
Great work
That’s a good start in our project. Let’s head over to discuss a very important aspect of components next, called Props!
Please support my work
Writing blog posts and making videos is an effort that takes many hours in my day. I do it because I love teaching and make great content. However, I need your support too. Please support my work and follow my social accounts to help me continue to make great content. Here are my social links.
Follow me on Twiter
Subscribe to my channel on Youtube
Thank you!
