


We accomplished a lot in the last few chapters. We also managed to style our app using a stylesheet. We will be creating more components and even pages in our app. So it is good time to structure our app and give it a central layout.

Generally there are many scenarios in which we want to give some common code to all of our pages in the app. Some scenarios for eg:
- Giving the same overall layout to all components(Sidebar, Navbar, Containers, Modals etc)
- Giving all pages the same stylesheet
- Giving all pages access to the same Javascript scripts to run analytics, common code etc.
As for us, we want all the pages in our website to have the same stylesheet that we added on to our home page. And we also want all of our pages to be able to navigate to other pages using a Navbar.
To accomplish that, we will talk about two things in this chapter:
- the hidden _app.js page and
- the Link component from Next js.
What is this _app.js?

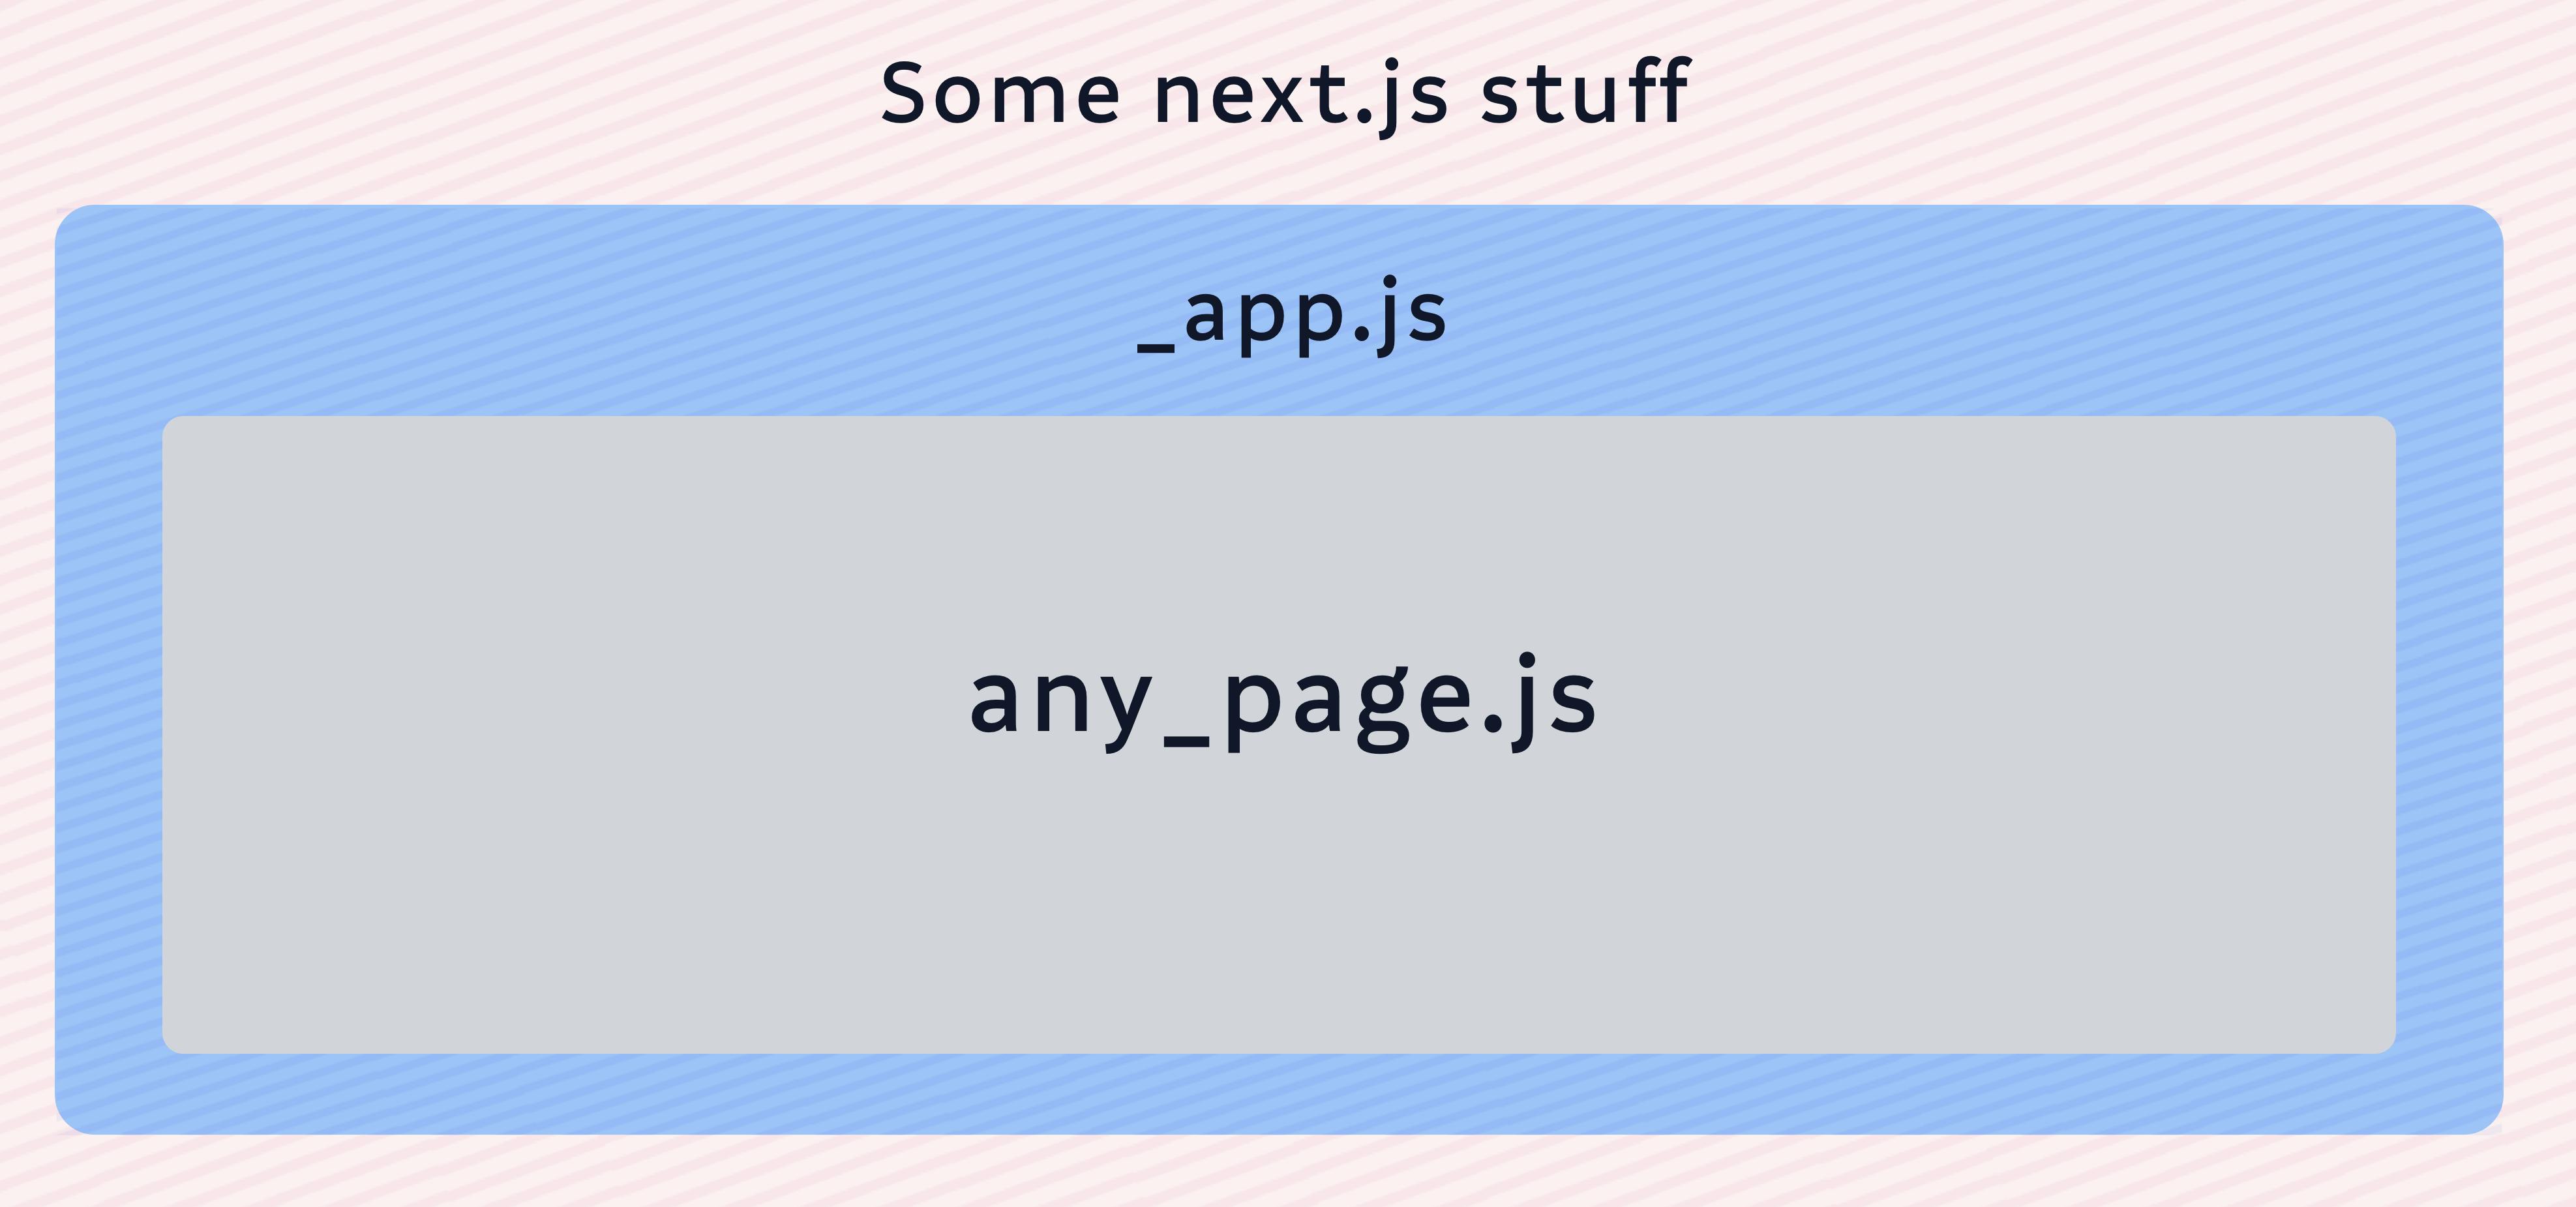
When a NextJS app is running, and when a user lands on a particular route, NextJS tries to figure out which page to load. Once it figures out which page to load, it loads the page component through _app.js. In other words, _app.js is the global entry point for all of our pages.
So a basically, when you land on any route within our app,
- a bunch of Next.js code runs,
- the default exported component in _app.js is rendered
- finally the requested page is rendered.
To make global customisations easier, the NextJS team decided to expose a way in which the _app.js file can be overwritten. If we create our own _app.js file in our pages folder, then this will overwrite the default _app.js of NextJS internals.
The default _app.js file from the Next.js docs looks like this.
// pages/_app.js
function MyApp({ Component, pageProps }) {
    return <Component {...pageProps} />
}

export default MyApp
What is the this code in _app.js even doing?
If we look closer,
- The MyApp component is receiving two props; Component (the page component to render) and pageProps (nextjs internal props to send to the Page component).
- We don't have to worry too much about what exactly both these are, but the Component is the page Component to render and pageProps are the props that the Page component needs (Next.js figures out these props for us.)
So first of all, let us create a file at pages/_app.js with the same contents and put it in place. We might have to restart the app. But once we do that, we can see that even though nothing has changed our app works exactly the way it did earlier.
// pages/_app.js
function MyApp({ Component, pageProps }) {
    return <Component {...pageProps} />
}

export default MyApp
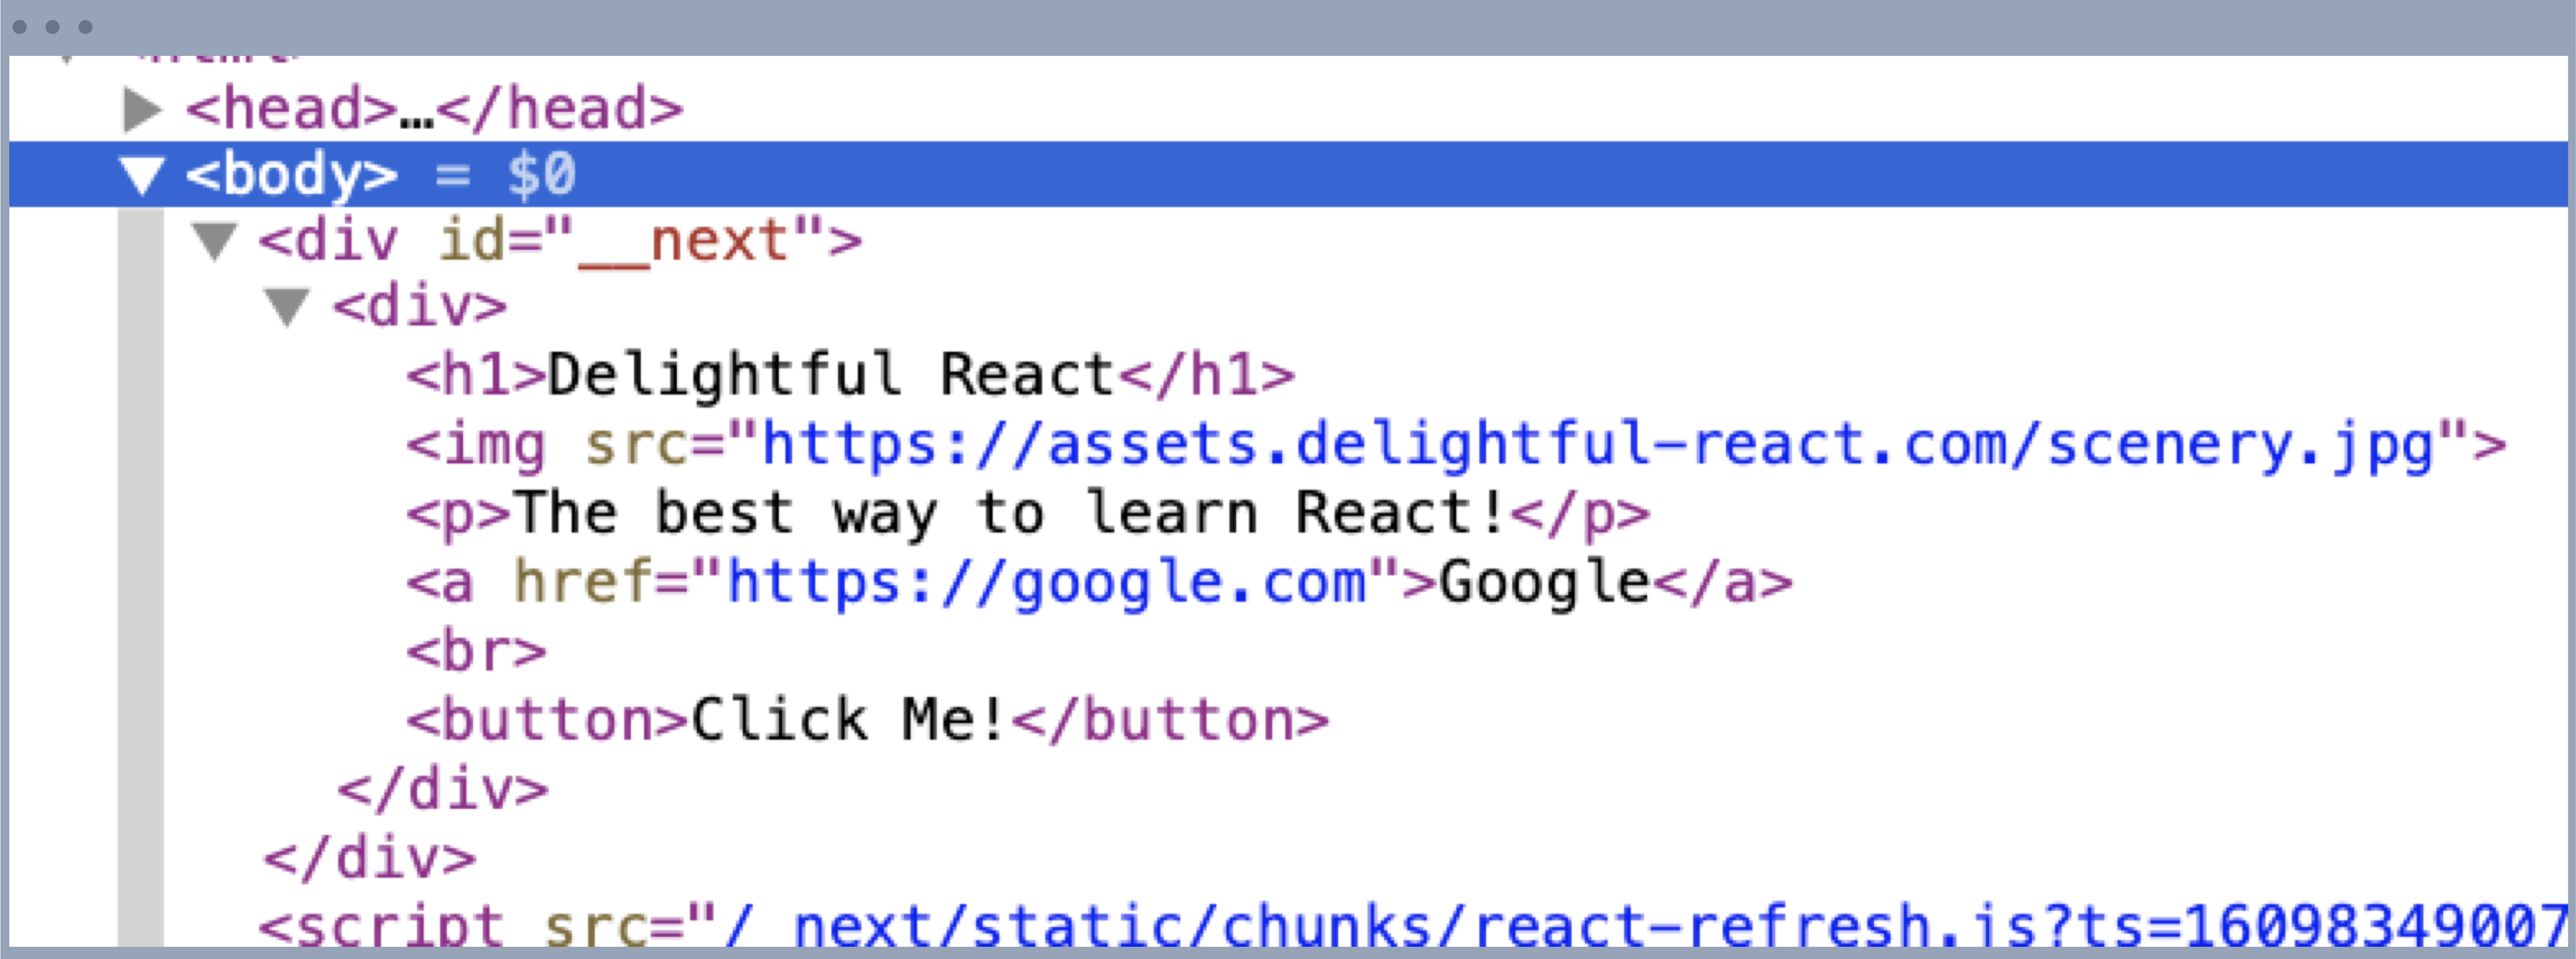
Let’s take a look at the HTML now.
Seems like all of our content is put inside a div with id of __next.
Alright. We won’t remove any of the important stuff. Let’s only rearrange the parts of MyApp component.
Now let us make a few tiny changes.
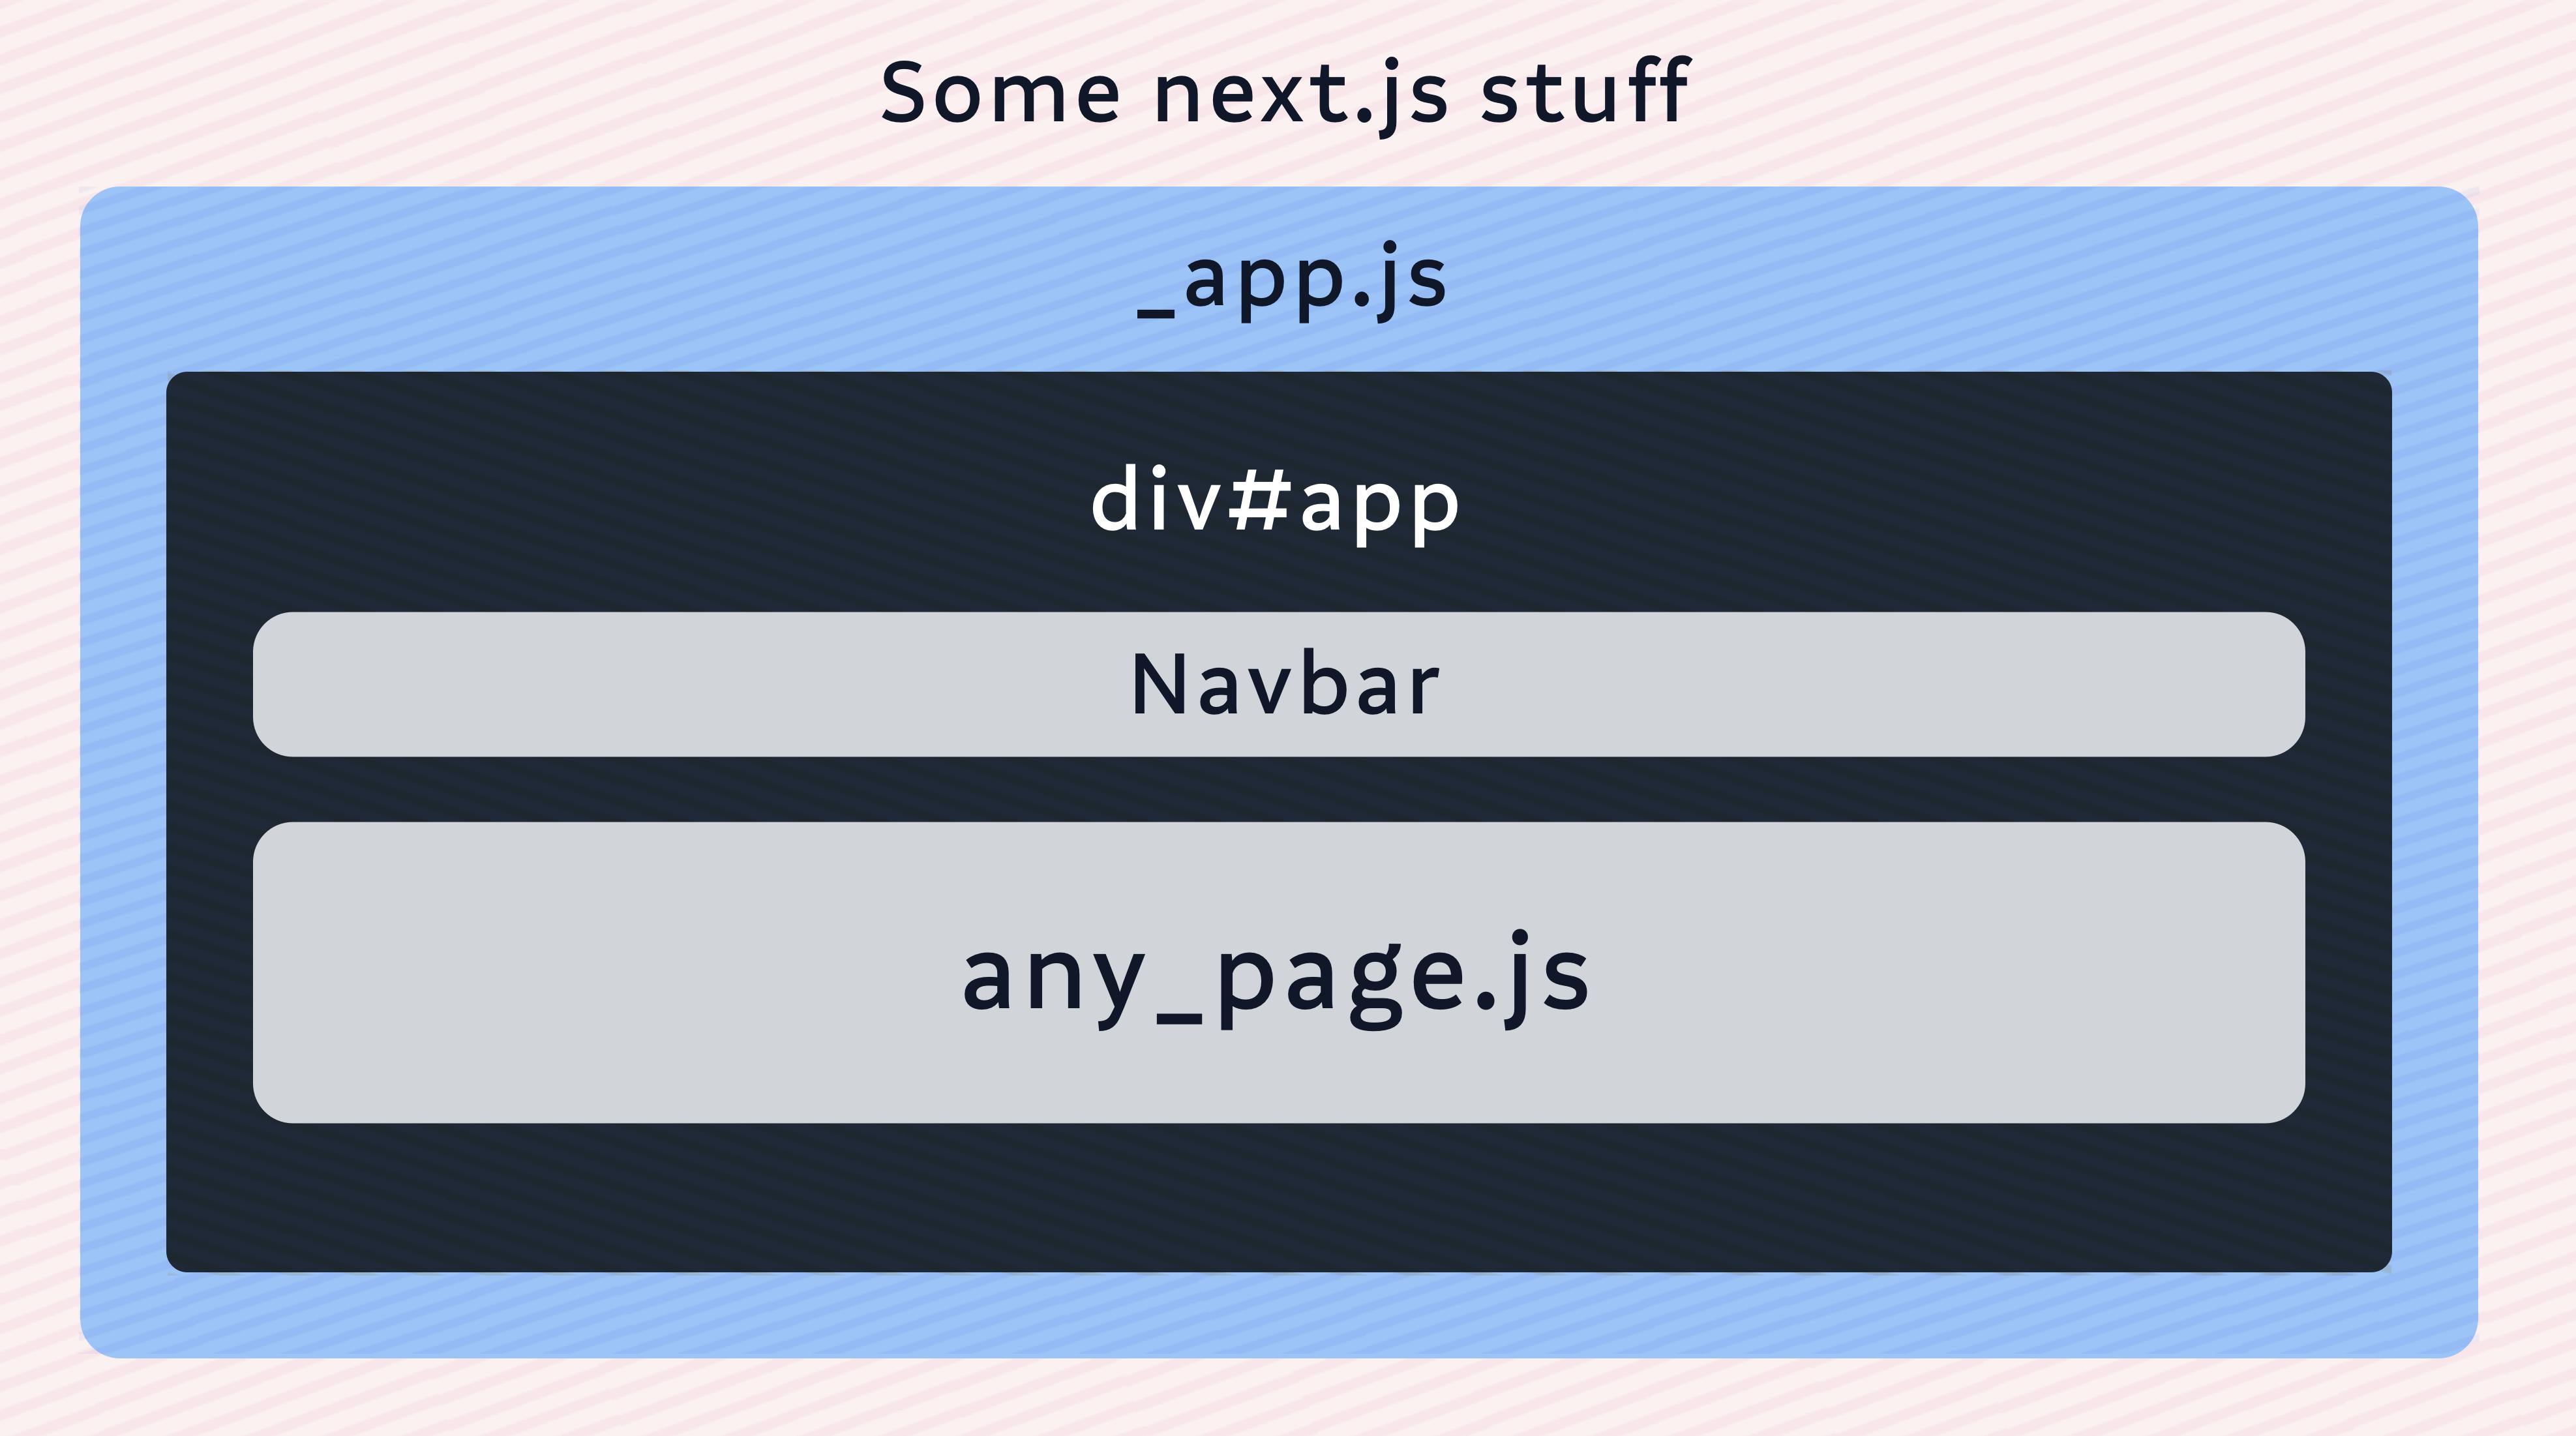
We created a new Navbar component and also wrapped both our Navbar and the Page component inside a div#app. And we moved our stylesheet into our MyApp component!
// pages/_app.js
import Head from 'next/head'

function Navbar(){
    return <div id="navbar">
    </div>
}


function MyApp({ Component, pageProps }) {
    return <div id="app">
        <Navbar/>
        <Head>
            <link
                rel="stylesheet"
                href="https://assets.delightful-react.com/style.css"
            ></link>
        </Head>
        <Component {...pageProps} />
    </div>
  }

export default MyApp
Now let's take a look at HTML.
 We can now see that all of our pages, the homepage and the about page, have both these changes applied and the stylesheet is loaded for all pages!
The _app.js is file is perfect for giving a central layout to our app overall. We simply need to determine where to render the Page component and plan the layout of the app around it.
This is perfect. Now, let’s modify our Navbar component to navigate across our pages easily.
Navbar
First of all, let us add a couple of anchor tags.
import Head from 'next/head'

function Navbar(){
    return <div id="navbar">
        <a href="/">
        </a>
        <a href="/about">
        </a>
    </div>
}
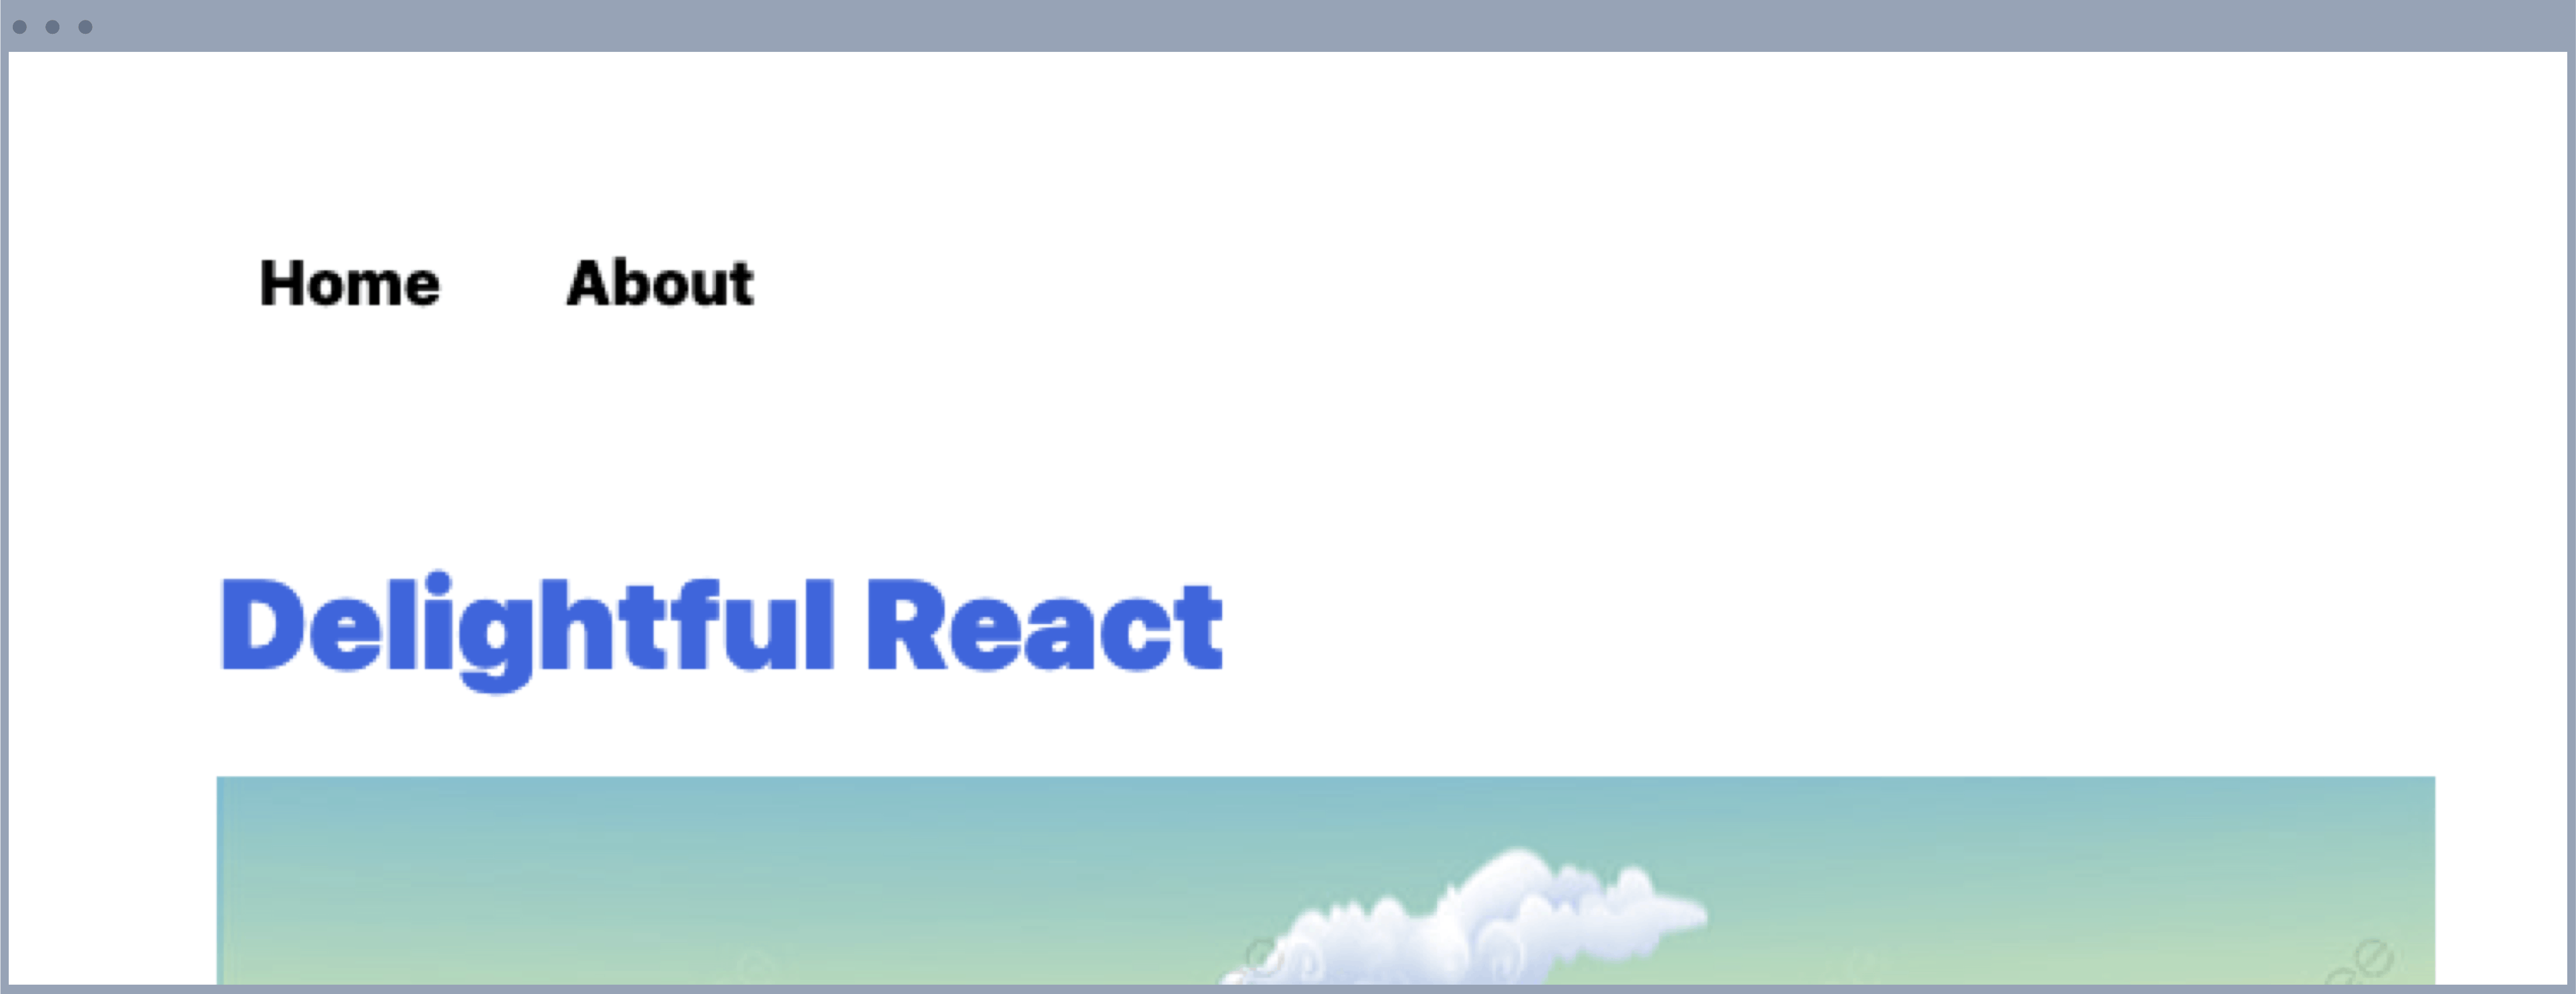
So that should make our site look like this.
And we should be able to navigate across pages. However, we can see that this route transition is actually quite slow. So what is the reason?
- The reason is that NextJS is so much more than a simple react dev server. It also has a Node server which processes requests.
- And when we navigate across pages across pages using just the anchor tag, each transition is actually hit on the Node server and then the React client.
- Next.js is a framework that has server rendering out of the box to help businesses build Search engine friendly websites. And this requires the pages to be generated on a Node.js server and also on the Javascript end.
- We will discuss more about this in a later chapter in this very book, but for now, we can take away the following.
We don't need to server render pages when we transition across pages.
However that will occur if only an anchor tag is used in Next.js. To make the transition only occur on the React side to keep our app very fast, Next.js comes with a Link component, which we can use like so. Let’s discuss this topic in more detail in the “Server Side Rendering” Chapter.
// pages/_app.js
import Head from 'next/head'
import Link from 'next/link'

function Navbar(){
    return <div id="navbar">
        <Link href="/">
            <a>Home</a>
        </Link>
        <Link href="/about">
            <a>About</a>
        </Link>
    </div>
}
That should make our transitions much much faster.
A Custom NavItem component
All the action items in our Navbar need to have a Link component and also an anchor element inside them. So we can make this behavior reusable by making a component out of it, called NavItem. And let us put the Link component and anchor tag like so, and then use it using props in the Navbar component.
// pages/_app.js
import Head from 'next/head'
import Link from 'next/link'

function NavItem({href, children}){
    return <Link href={href}>
            <a>{children}</a>
        </Link>
}

function Navbar(){
    return <div id="navbar">
        <NavItem href="/">Home</NavItem>
        <NavItem href="/about">About</NavItem>
    </div>
}
Let’s add another page
Our blog website needs to list blog posts which when clicked, show the blog post in more detail.
The component in the pages/index.js file currently is better suited for the blogpost detail page. So let’s rename that file to pages/blogpost.js and let’s create a new pages/index.js for our home page where will start listing out blogposts. So, 1) Rename pages/index.js to pages/blogpost.js
2) Create a new pages/index.js file with these contents.
import Heading from "../src/components/Heading";

function Home(props) {
  return (
    <div>
      <Heading>All Posts</Heading>
    </div>
  );
}

export default Home;
3) Update Navbar component with all 3 links.
function Navbar(){
    return <div id="navbar">
        <NavItem href="/">Home</NavItem>
        <NavItem href="/about">About</NavItem>
        <NavItem href="/blogpost">Blogpost</NavItem>
    </div>
}
Great work yet again!
We did quite a lot this chapter. We added an overall layout to our app, added our stylesheet for all our pages and also added a Navbar.
Let’s keep moving forward!
Please support my work
Writing blog posts and making videos is an effort that takes many hours in my day. I do it because I love teaching and make great content. However, I need your support too. Please support my work and follow my social accounts to help me continue to make great content. Here are my social links.
Follow me on Twiter
Subscribe to my channel on Youtube
Thank you!